- Home Page
- Soft Kites
- ... Parachute Kite
How to Make a Parachute Kite
Step-by-Step—Page 3 of 3
The MBK Parachute
The Bridle
Making the Lines
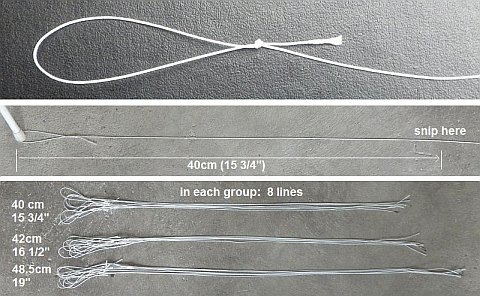 Bridle lines knotted and cut to length
- Take some Dacron flying line and tie a Simple Loop knot into the free end, as in the top photo.
- Anchor the loop to something fairly narrow and cut off the line at exactly 40 cm (15 3/4 in.). This is illustrated in the middle photo.
- Now make another seven bridle lines to the same length. Anchor the lines one by one with the first line so you can accurately snip off a new one at the right length.
- Repeat this process to make another group of eight lines, but this time all 42 cm (16 1/2 in.) in length.
- Repeat once more to make a group of eight lines that are 48.5 cm (19 in.) in length. All three groups of lines are shown in the bottom photo.
Hint: If you mark the first piece of line in each group with black marker, right at the untied end, it will be easier to use it as a template for cutting all the other pieces to the same length. Black next to white is easy to see!
Attaching the Bridle Lines
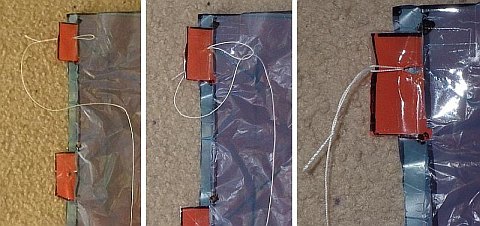 Steps to attach a bridle line
- Take one of the shortest (40 cm) lines already prepared. Push the looped end through one of the attachment points nearest the leading edge of the canopy. See the first photo, above.
- Pass the other end of the line through the loop, as in the second photo.
- Pull tight, without damaging the attachment point of course. See the third photo.
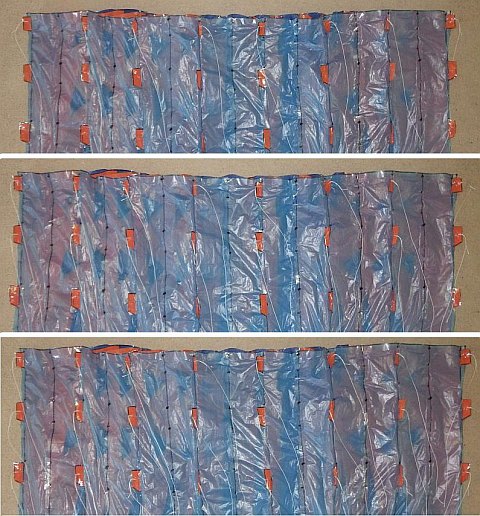 All bridle lines attached
- Continue attaching 40 cm lines until the whole row is done. See the top photo.
- Attach the mid-length (42 cm) lines to the next row of attachment points. See the middle photo.
- Finally, attach the longest (48.5 cm) lines to the remaining row of attachment points. See the bottom photo up there. Now, all 24 bridle lines are attached to the underside of the canopy.
Tying the Bridle Lines
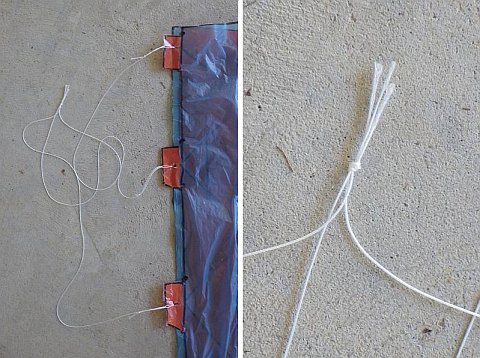 Three bridle lines of different lengths tied together
- Bring the lines attached to a group of three attachment points together. See the photo on the left, of a corner of the canopy.
- Line up the ends of the lines with each other, before tying them with a Multi-Strand Simple knot. See the closeup in the photo on the right. You might be able to get the lengths more even than I did!
See the photo below, where all eight groups of
lines have been tied. The knots are a little hard to spot, but have
been arranged near the top edge of the photo.
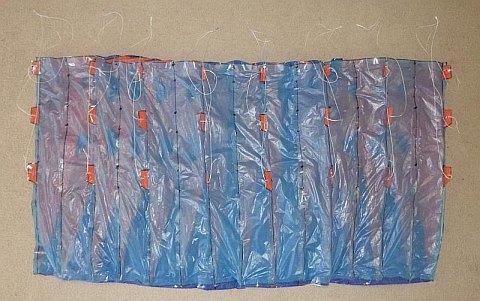 All eight bridle line groups tied off
Taping the Bridle Line Groups
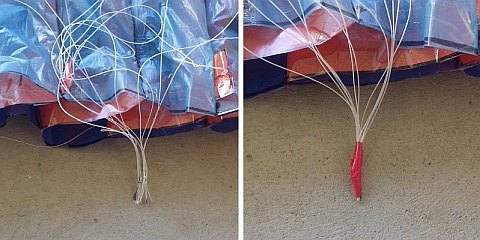 Taping the bridle line groups of half the canopy
- Bring four groups of lines together, from one half of the canopy. See the photo on the left. Try to keep the ends (not the knots!) level with each other.
- Wind electrical tape around a few times, just covering the knots. See the photo on the right.
- Do the same for the four groups of lines on the other side. See the photo below for a view of the whole bridle at this point:
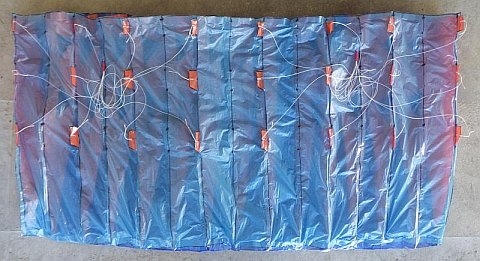 Bridle—both sides taped
The Bridle Connecting Line
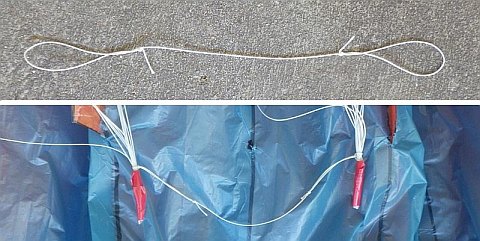 The two sides of the bridle connected
- Cut off 30 cm (12 in.) of line and tie a Loop knot into both ends. The size of the loops is not too important, so just be guided by the top photo.
- Attach each loop behind the electrical tape on the bridle lines, as shown in the bottom photo. Use Lark's Head knots.
Note: Although this connecting line—and the next line also, below—are shown in 20-pound strength, it would really be a better idea to use 30 or 50-pound line instead. These lines will take the full tension of the kite in flight!
The Short Bridle Line
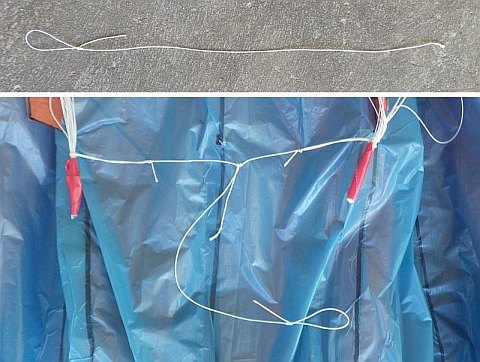 The bridle completed
- Again, cut off a piece of flying line 30 cm (12 in.) long.
- Tie a Double Loop knot into one end. On the far left, in the top photo above. Do a Simple knot at the other end—just barely visible in the photo.
- Tie the end with the Simple knot around the middle of the bridle connecting line with a Prusik knot—or any other sliding knot. See the bottom photo.
The Brake Lines
To add a touch of realism to this parachute kite,
it will have two brake lines attached to the trailing edge. These can
be used to trim out a turning tendency, if required.
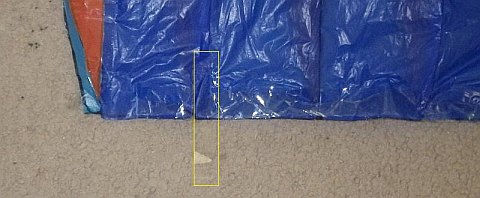 Tape stuck to upper surface of trailing edge
- Take a 8 cm (3 in.) length of sticky tape and stick half of it to the upper side of the trailing edge. The tape is aligned with the next rib in from the tip. The tip rib can be seen in orange above.
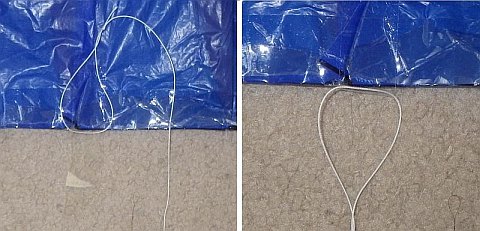 Brake line attached to trailing edge
- Tie a Loop knot into an 80 cm (32 in.) length of 20-pound flying line. Tie a Simple knot into the other end, just to stop the tip from fraying. Thread the tape through the loop as shown in the photo on the left.
- Fold the tape under and stick it to the lower-surface plastic. To prevent splitting of the tape, fold around a couple more pieces of tape. Just like the first one, but they can be much shorter. The loop is now attached to the trailing edge, as in the photo on the right. The tape is quite invisible in that photo!
Like to see a video clip? Just scroll down to near the end of this page.
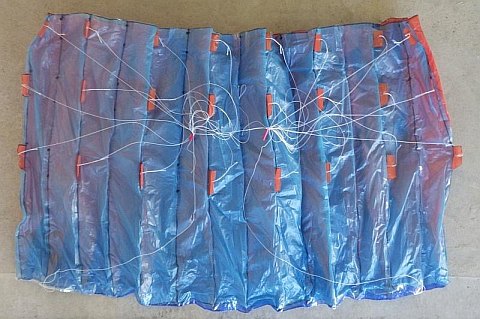 Both brake lines attached
- Using the steps already done, add another brake line to the canopy—one rib in from the other tip rib.
- Flip the canopy over and tie each brake line just behind the electrical tape nearest to it—red colored and near the middle in the photo above. Use Half-Hitches, since these are easy to loosen off and retie if necessary.
Note: Both brake lines should be left quite slack when the kite is suspended from its bridle. If the kite has a tendency to turn or lean in one direction during flight, you can tighten one line to make that side more "draggy" and hence cure the problem.
The Drogue
For yet another touch of realism, you can add a
drogue 'chute. This is entirely optional! It's just for looks. On a
full-size canopy, this is what drags the main 'chute out of its
bag.
Measuring the Drogue
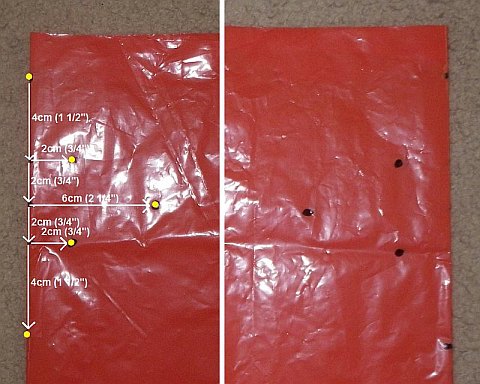 Measured and dots marked
- Place some plastic on the floor. I went with the rib color—orange plastic. Fold it in half from left to right and run a sharp straight crease down the left-hand side.
- Starting from near the top left corner, measure and mark dots on the plastic. Follow the arrows—see the photo on the left. Dots have been highlighted in yellow.
- Flip all the plastic over. Smooth out the two layers of plastic, double checking that the vertical crease stays in place.
- Make dots over all the dots showing through the two layers of plastic. See the photo on the right.
Completing the Drogue
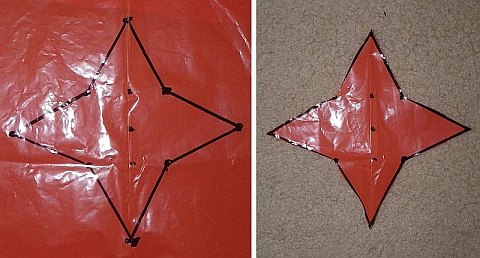 Lines marked and drogue shape cut out
- Open out the sheet of plastic and lay it flat.
- Connect the dots with marked lines as shown in the photo on the left.
- With scissors, cut all around the outline. See the photo on the right.
 Square piece of plastic scrunched up and attached to line with tape
- Cut out a 10 cm x 10 cm (4 in. x 4 in.) square of sail plastic, scrunch it up and attach it to the free end of some flying line with sticky tape. The tape should also hold the ball of plastic together. See the photo.
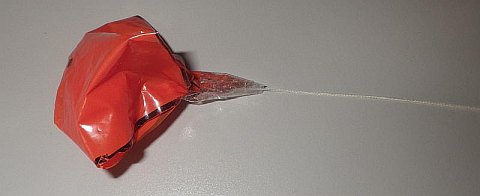 Folded and taped drogue
- Place the ball of plastic inside the cut out drogue plastic.
- Fold up the corners around the plastic ball and secure with a few turns of sticky tape. The line should exit where the corners came together. See the photo.
Attaching Drogue to Canopy
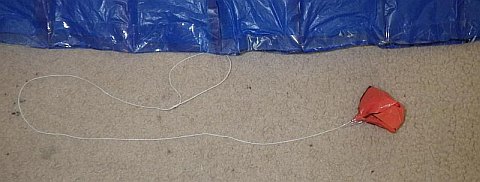 Drogue attached to trailing edge of canopy
- Cut off the flying line about 60 cm from the ball of plastic and attach it to the trailing edge of the canopy, right in the middle. Use a Loop knot plus sticky tape, just like you did for the brake lines. See the photo up there.
After Kite Completed
Packing the Kite
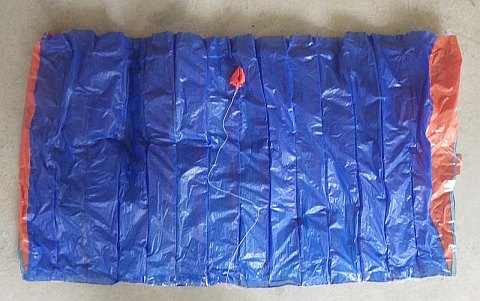 Kite laid out, showing the upper surface
- Lay the kite down, stretched to full width, with the upper surface plastic on top.
- Take the drogue, and place it near the leading edge of the kite, right in the middle. Now the kite should look like the photo up there.
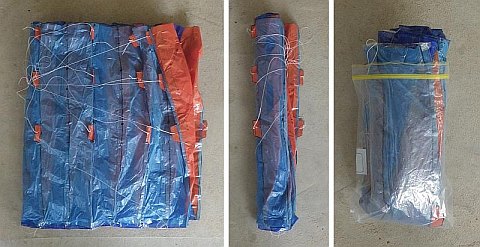 Remaining steps to pack away without tangles!
- Take the left-hand edge of the canopy, and fold it to the right until it lines up with the opposite edge. See the first photo.
- Starting from the left-hand side, roll the plastic into a narrow tube. Notice how the left and right sets of bridle lines are kept separate by this process. There's the rolled up kite in the second photo.
- Fold the tube up from bottom to top. Then insert the tube into a suitable plastic bag for storage or transport to the flying field.
Flying!
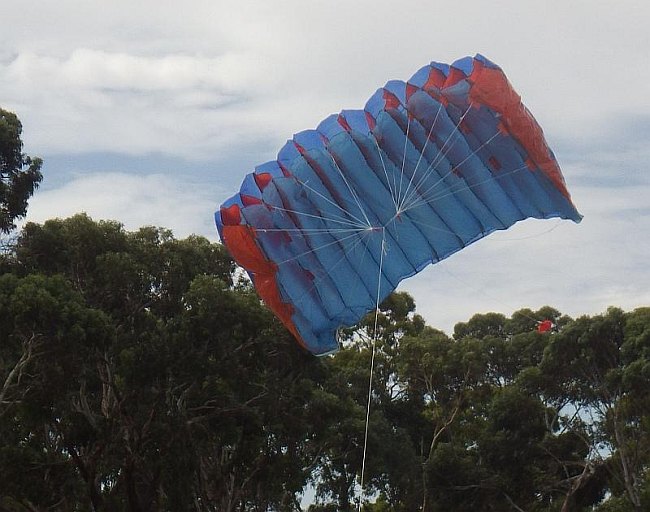 Attach line, inflate, let out line
After unrolling the kite at a flying field, your flying line can be tied through the Loop knot of the bridle. That's it; you're ready to fly.
Alternatively, you can Lark's Head the flying line behind the knot. This makes it easier to attach the flying line and take it off again.
If the kite needs it, in fresh winds, adjust one of the brake lines to keep it flying straight. For example, if the kite seems to spend a lot of time leaning to the left, you need to tighten the brake line on the right—as seen from the flier's perspective. Experiment until the kite behaves itself. The other brake line should have some slack in it while the kite is flying.
I hope you enjoyed learning how to make my 14-cell Parachute kite design!
As mentioned earlier, there's more kite making on this site than you can poke a stick at. :-)
Want to know the most convenient way of using it all?
The Big MBK E-book Bundle is a collection of downloads—printable PDF files which provide step-by-step instructions for many kites large and small.
That's every kite in every MBK series.
