- Home Page
- Kiting Knots
- Slip Knot
The Slip Knot
And Its Kiting Applications
A small Loop knot or Double knot in the end of the line prevents a Slip
knot from
coming undone—at least in theory! In practice, the loop can still
loosen off with handling, allowing even a large knot to slip through. A
Double Wrap Slip knot is a better idea and will hold tight a lot
longer.
A tiny dob of glue will make the knot permanent after it is first tied and tightened. Alternatively, you can simply check all the knots before each flight, retightening where necessary. They are less likely to loosen in flight.
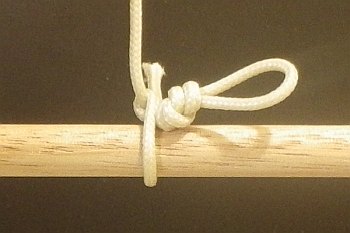 Slip knot with Loop knot stop
On this site, there's more kite-making info than you can poke a stick at. :-)
Want to know the most convenient way of using it all?
The Big MBK E-book Bundle is a collection of downloads—printable PDF files which provide step-by-step instructions for many kites large and small.
That's every kite in every MBK series.
Slip Knot
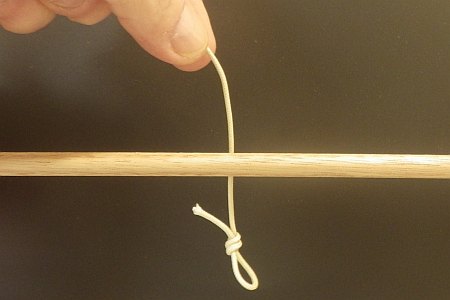 1. Start with a small Loop knot in the end
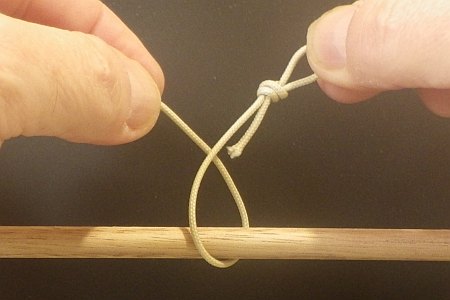 2. Around and across
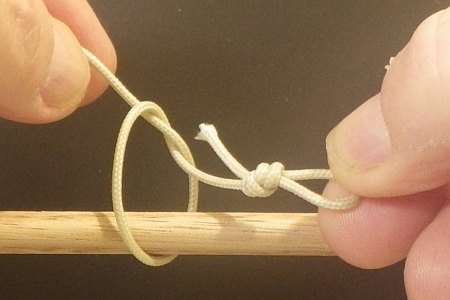 3. Round the back and through
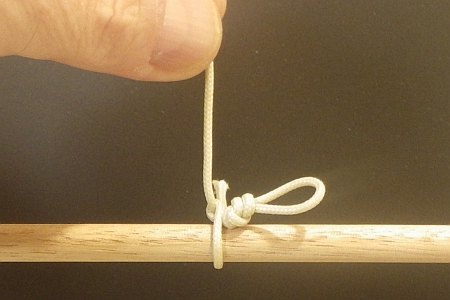 4. Tighten against loop knot
I have used this knot many times for securing bridle lines to spars. If you keep the Loop knot as small as possible, it doesn't look too untidy. It's a good idea to not fix the knots with glue until after the kite has had its first test flight or two. That's just in case you decide to make any changes!
For a barn door kite which stays rigged, this knot can attach the bridle lines to the frame and hold the spars together where they cross. However, I soon discovered that fixing the knots with glue was necessary. The constant flexing of the spars in flight tended to quickly loosen off the knots!
For a time, I experimented with using the single-wrap knot to secure the sail corner ties of the Dowel Roller and Dopero to the horizontal spar. You have no adjustment, though, so I later stuck with Half Hitches. That's not the most secure, but at least you can adjust the length of the tie if you don't get it right the first time. It's just a matter of unpicking the knot and retying.
Another tip: It is simpler and neater to use a single-strand knot such as a Figure Eight instead of a Loop to stop the line from pulling through. However, it is not as reliable due to the much smaller size of the knot, so it would pay to fix it with a drop of glue. I have discovered from experience that if you use wood glue, the knot can still be worked apart later if you need to reuse the materials for another kite.
Double Wrap Slip Knot
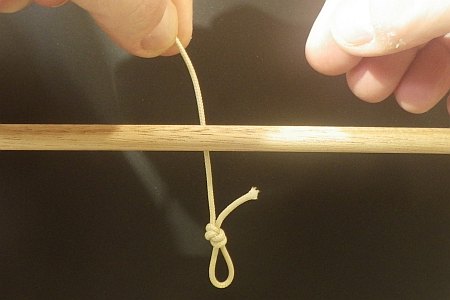 1. Start with a small Loop knot in the end
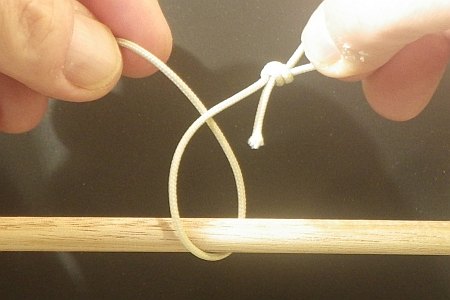 2. Around and across
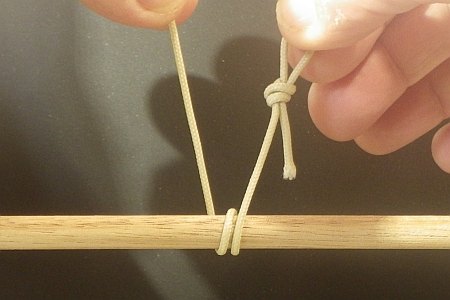 3. Around once more
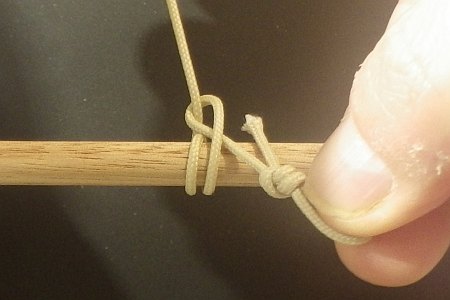 4. Around the back and through
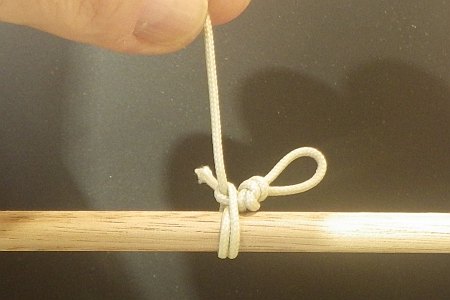 5. Work around until tight
For a Double Wrap Slip knot, just wrap the line around the spar twice instead of once, before slipping the Loop knot through. Not surprisingly, this version stays tight a lot longer.
The last caption up there says "work around until tight." This just means to pull the line back and forth, causing the wraps to slide around the dowel. First move in one direction and then the other, back and forth. While this is happening, the Loop knot will creep towards the wraps until it comes up tight. It feels so satisfying. :-)
As mentioned earlier, there's more kite making on this site than you can poke a stick at. :-)
Want to know the most convenient way of using it all?
The Big MBK E-book Bundle is a collection of downloads—printable PDF files which provide step-by-step instructions for many kites large and small.
That's every kite in every MBK series.
