- Home Page
- Soft Kites
- ... Octopus Kite
How to Make an Octopus Kite
Step-by-Step—Page 3 of 5
The MBK Octopus
Assembling Octopus Head
Attaching a Middle Rib
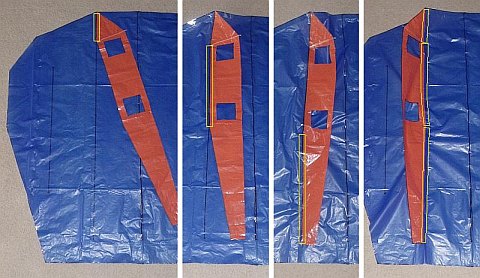 A middle rib taped to upper surface plastic
- Lay down the upper surface plastic with the tape edging facing up.
- Referring to the first photo, line up the first edge of a middle rib with the second-from-left guide line on the upper surface plastic. Run tape the full length of the join as indicated by the yellow rectangle. Trim off any excess tape with scissors.
- Draw the next edge of the rib to the upper-surface plastic as in the second photo.
- Run tape down the join—again, as indicated by the yellow rectangle. You may find it easier to be accurate if you tack the plastic down with very short lengths of tape first. If it doesn't look right, pull it up and try again. When happy with the join, lay down the full length of tape over the short bit(s). There's one more rib edge to go; do this as illustrated in the third photo.
- In the fourth photo, the rib has been flipped over so the other side of the join can be taped. Just apply tape section by section like it is on the other side. There's no need for short bits this time!
Attaching Remaining Middle Ribs
So far, you've taped in the leftmost middle rib,
on both sides of the join. In exactly the same way, tape in the
remaining two middle ribs. There they are, side by side in the photo,
attached to the central three guide lines on the upper surface.
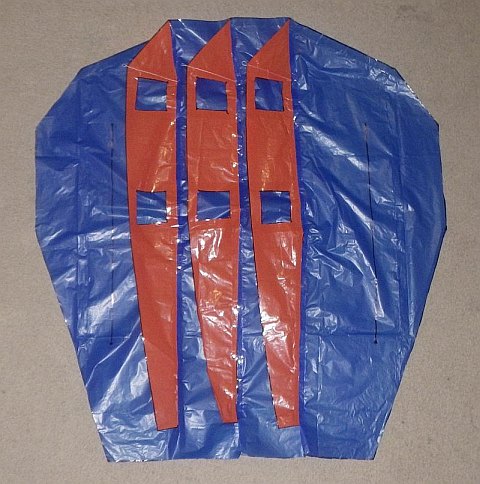 All three middle ribs attached to the upper surface plastic
Attaching Both Side Ribs
You know the drill by now, so no more yellow
rectangles!
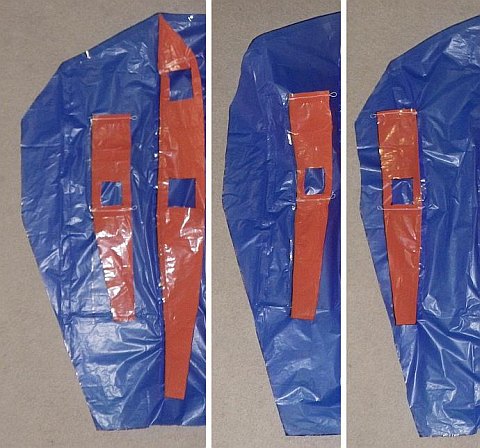 A side rib taped to upper surface plastic
- Take a side rib, and line it up with the guide line on the left side of the upper surface plastic as in the first photo. Tape the join.
- Move on to the other edge, taping it to the guide line. See the second photo.
- Now flip the side rib over. Flatten out and tape the two edges again, as in the third photo.
Finally, repeat
the taping process, adding the remaining side rib onto the only
remaining guide line on the upper surface plastic.
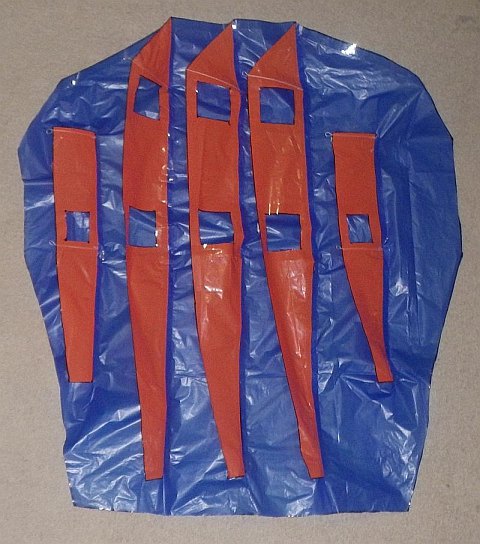 All ribs attached to the upper surface plastic
Attaching Lower Surface to a Middle Rib
The ribs on either side of the one already done will now be taped as indicated by the yellow rectangles:
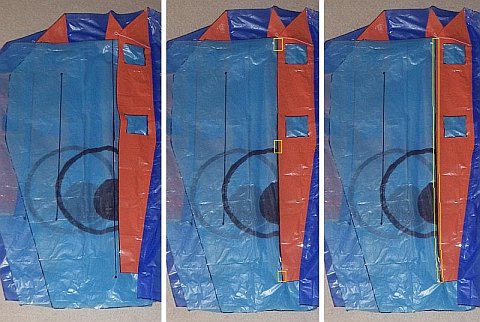 Another middle rib taped to the lower surface plastic
- Fold the right side of the lower surface plastic from right to left. Adjust so the long guide line is near the long edge of the rib as in the photo on the left.
- Tack the rib plastic to the guide line with short lengths of sticking tape. Ensure that the attachment point loop is positioned just like the one you have already done—touching the leading edge. See the middle photo.
- Looking good? You might need to gently pull at the ends of the join to get both the guide line and the rib's edge straight and aligned with each other. Run a long length of tape (or several!) along the join to secure it permanently as in the photo on the right.
There's no flipping the join this time! The tape is on one side only.
Now go to the
left side of the kite, and do these steps all over again for
the remaining middle rib. See the photo below, where the lower surface plastic has been stretched out to the left and right.
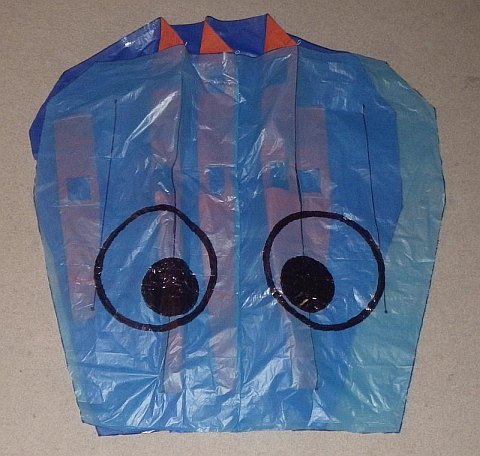 All three middle ribs taped in
Attaching Lower Surface to Side Ribs
Here's how to tape a side rib as indicated by the
yellow rectangles.
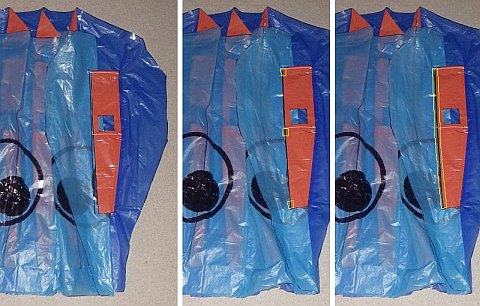 Side rib taped in
- Fold the right side of the lower surface plastic from right to left. Adjust so the guide line is near the long edge of the rib as in the photo on the left.
- Using a pen, poke holes in the guide line for the loops to go through. Tack the join in place with three short pieces of sticky tape—a bit tricky, so take your time. :-) See the middle photo.
- Looking good? Run a long length of tape along the join to secure it permanently as illustrated in the photo on the right.
Now go to the
left side of the kite, and do these steps all over again for
the remaining side rib. See the photo below, where once again the
lower surface plastic has been stretched out, showing the tiny
attachment loops poking through.
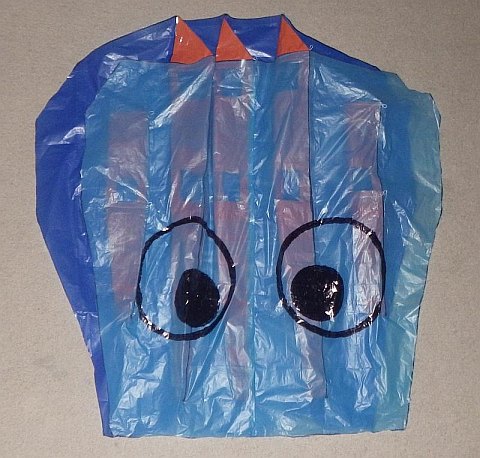 All five ribs taped in, with bridle attachment loops visible
Attaching Upper Surface to Lower Surface
This is achieved by taping the edges of the two plastic sheets together. This starts at the corners of the air intake
of the octopus head. Tacking plastic in place using short lengths of sticking tape is useful as in previous steps. Yellow rectangles make the
placement of tape clear:
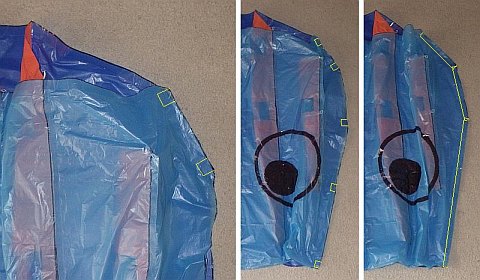 Edges of upper and lower surface plastic taped together
- Look carefully at the photo on the left to see where to do the first tack of the lower surface plastic to the upper surface plastic. As in previous steps, the upper surface plastic is against the floor. The yellow rectangle represents the visible portion of the tape. The other half is wrapped and stuck to the other side.
- Lining up each corner in turn, tack the remaining edges in place down one side of the head. As shown in the middle photo, the bottom edge stays free of tape; tails go in there later!
- Gently pull each pair of edges straight before applying a half width of tape along the entire edge and then wrapping round to the other side. See the photo on the right. I found it easier to apply tape to one side, flip the entire head, and then fold down on the other side.
- Now do all the above to the left side of the head to complete the job!
Below, you can
see a perspective of the entire head, taped down both sides.
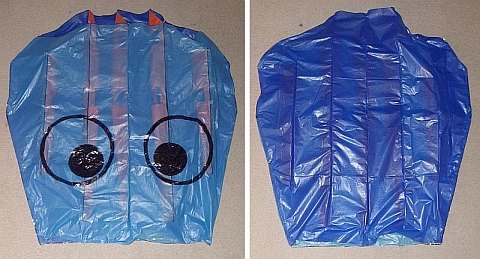 Completed octopus head, front and back
Well, it's very nearly completed. Reinforcing the corners of the air intake is actually the final step for the head.
Reinforcing Air Intake—Corners
Three short pieces of tape are used at each corner
of the air intake. These prevent separation of the plastic sheet due
to fine dust getting under tape or the stresses of flying and
occasional rough handling. Yellow lines indicate tape edges:
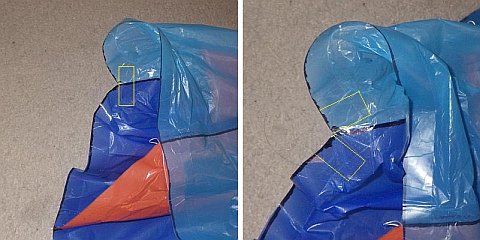 One corner of air intake taped
- Flatten one corner of the air intake so you can stick a short piece of tape straight across, onto the inside of the join. See the photo on the left.
- Wrap two pieces of sticking tape—about four times longer than they are wide—around the edge of the plastic. As shown in the closeup photo on the right, one piece of tape goes round the lower surface plastic and the other goes round the upper surface plastic.
- Now do the other side of the air intake in the same way. The photo below shows a perspective of the air intake from the front, with the corners sitting more normally.
 Whole air intake, upside down on floor
Reinforcing Air Intake—Ribs
Short pieces of tape—about four times longer than wide—are also used at each point where the middle ribs meet the edges of the upper and lower surfaces. This is for much the same reasons as before—dust and mechanical stress! Yellow lines indicate tape edges:
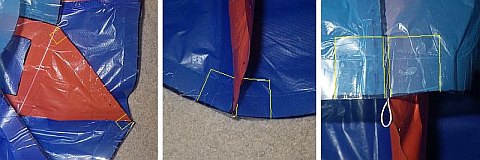 Where to wrap tape around a middle rib
- The photo on the left shows where to wrap two short strips of tape around the exposed edge of a middle rib. Note how some of the tape ends up stuck to the upper surface plastic (dark blue).
- The middle photo shows where to wrap tape around the edge of the upper surface plastic. A small bit of tape will end up stuck to the orange rib plastic for two of the three middle ribs.
- The photo on the right shows how tape is wrapped around the lower surface plastic at the other end of the rib edge. No tape ends up on the rib plastic here, since the lower surface plastic edge stays straight all the way across the air intake.
The other two middle ribs are done similarly with six pieces of tape each.
As mentioned earlier, there's more kite making on this site than you can poke a stick at. :-)
Want to know the most convenient way of using it all?
The Big MBK E-book Bundle is a collection of downloads—printable PDF files which provide step-by-step instructions for many kites large and small.
That's every kite in every MBK series.
