- Home Page
- Soft Kites
- ... Sled Kite
How to Make a Soft Sled Kite
Step by Step—Page 1 of 2
The MBK Soft Sled
Learn how to make a soft sled kite with these easy-to-follow instructions. It's fully illustrated with large photographs every step of the way.
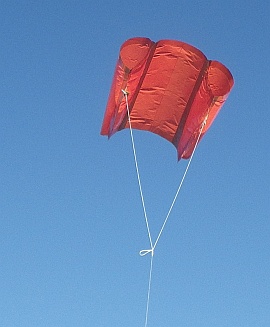 MBK Soft Sled
Another name for a soft sled is a para sled. With those two large ram-air cells, you can see the similarity to a parafoil.
Don't be too concerned about the length of these instructions. The steps are easy, hence this sled will soon come together.
You can attach a tail at each lower corner if you want to, just for looks, or even a single tail from the middle of the trailing edge. The kite does just fine without them as can be seen over there in the photo.
We don't hesitate to take out our MBK Soft Sled to inland fields where the air is a bit rough at times. It copes! Like all sleds, it's very convenient to fly; just attach the line, and up it goes!
This kite suits fairly light to fresh winds. That is, speeds from about 8 kph right up to 35 kph. This could vary a little depending on exactly what kind of plastic and tape you are using.
On this site, there's more kite-making info than you can poke a stick at. :-)
Want to know the most convenient way of using it all?
The Big MBK E-book Bundle is a collection of downloads—printable PDF files which provide step-by-step instructions for many kites large and small.
That's every kite in every MBK series.
How to Make a Soft Sled Kite
The Sail
Measuring the Sail
The kite described here will need fairly heavy bag plastic. The orange plastic in the photos is a high-strength garden bag. Another alternative would be painters' heavy-duty drop-sheet plastic. If very thin and flimsy plastic is used, your kite might tend to fold up in the air rather than fly.
If the plastic is hard to see through, it's probably thick enough!
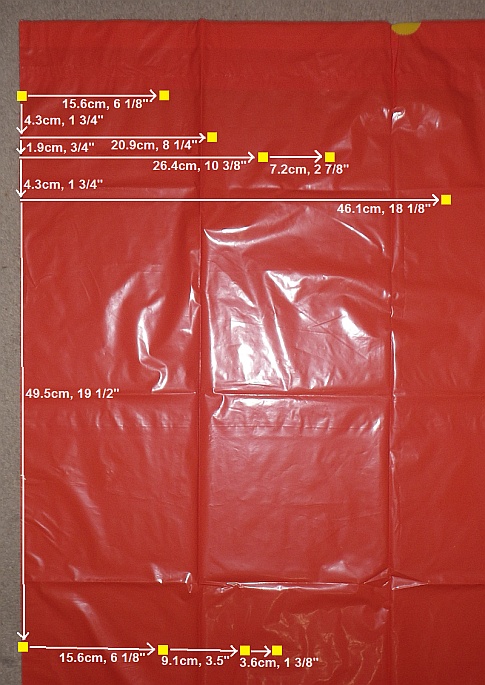 Measure and mark dots
- Place your plastic bag flat on the floor. In the case of plastic sheeting, fold it in half from left to right and run a sharp, straight crease down the left-hand side.
- Starting from near the top left corner, measure and mark dots on the plastic. Just follow the arrows marked on the photo. I've highlighted the dots in yellow.
Judge the horizontal and vertical directions by eye. If you're careful, there's no need for a T-square. The slight slope near the bottom of the photo is just the camera distorting the image. The arrows should be horizontal!
Marking the Sail
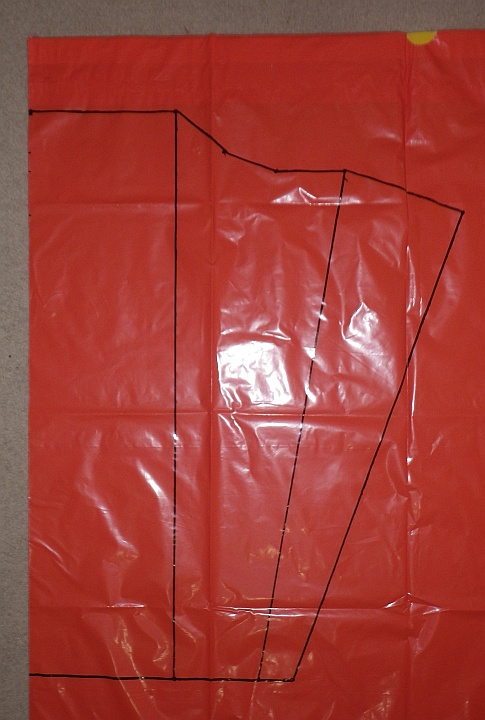 Connect the dots
- Take your ruler, and connect the dots with the black marker pen as shown in the photo.
- Flip all the plastic over, and trace over all the black lines showing through the two layers of plastic.
Hint: If it's too hard to see through the plastic, just lay it up against a window. The light from outside should show up the lines easily. Mark dots at all the corners, and then connect the dots using pen and ruler.
I know what you're thinking—why not just rule one set of lines and then scissor cut the two layers of plastic at once?
Answer—it's very easy for one sheet to slip against the other while cutting, with horribly inaccurate results! Do it my way, and your kite will fly perfectly the first time.
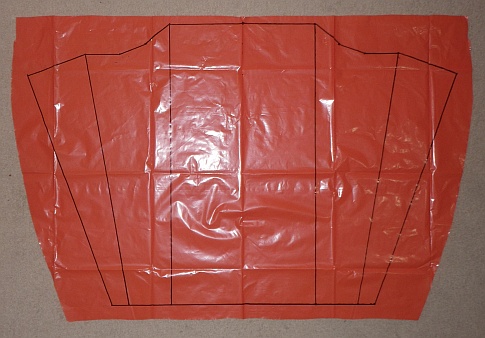 Sail plastic opened out
- Open out the plastic to show the complete sail outline as in the photo above.
If using a bag, you'll first need to cut off the top, bottom, and right-hand sides of course. So you can unfold it right to left. That's what I've done in the photo above.
Taping the Sail
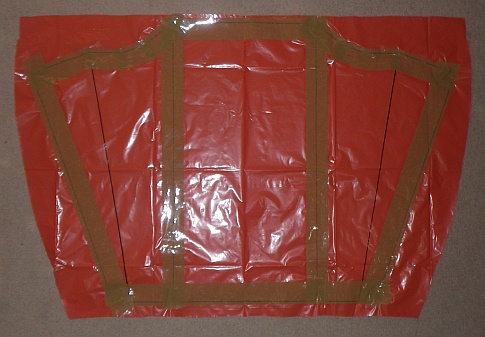 Marked side taped
- Lay packing tape along the marked lines as shown in the photo above.
Around the outside of the sail, let the tape overlap the black lines by about a finger width. Leave most of the tape inside the outline.
For the two central lines drawn down through the sail, try to center the tape's width over each line—as close as you can get it by eye!
Hint: It's a lot easier to use packing tape when the roll is sitting in a dispenser. Pull tape out to length, and then tear off just like office sticking tape.
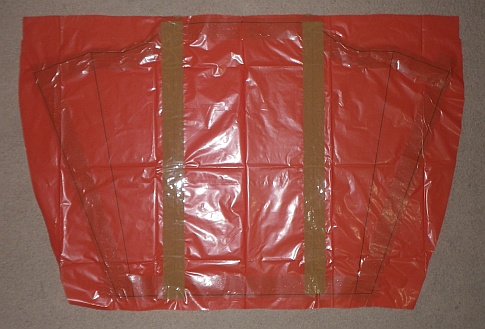 Unmarked side taped
- Now flip the plastic over.
- Lay packing tape along just the two lines closest to the center of the sail. See the photo above.
Cutting the Sail
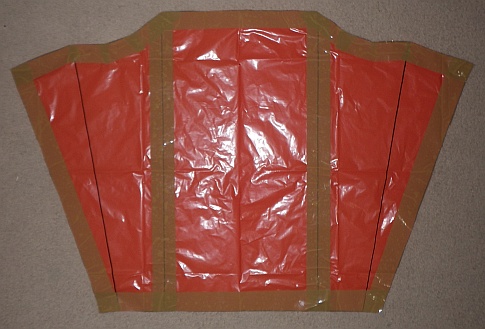 Sail cut
- Take your scissors, and cut all around the outside of the sail along the black lines. When you are finished, it should look like the photo up there.
Measuring the Cells
The cells are the inflatable pockets that do the same job as rods of wood or fiberglass in a simple sparred sled. Hence some call this kind of soft sled a ram-air sled. The air rams in the front opening, helping to keep the cell rigid while in flight!
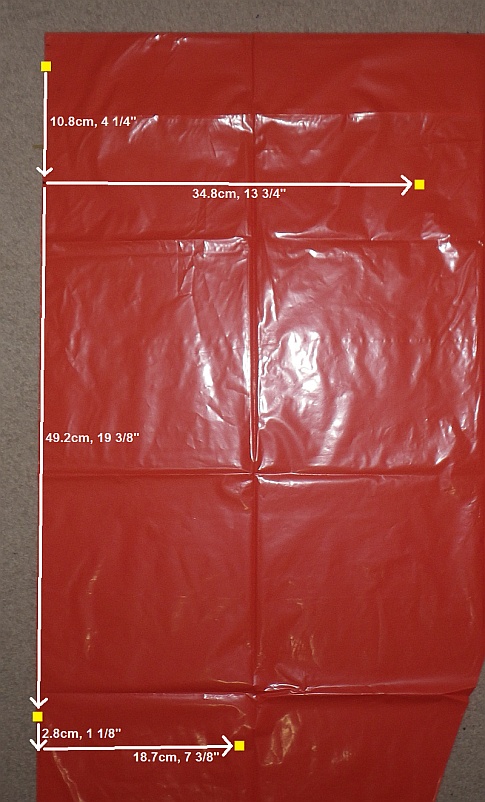 Measure and mark dots
- As before, place your plastic bag flat on the floor. In the case of plastic sheeting, fold it in half from left to right, and run a sharp straight crease down the left-hand side.
- Just like you did for the sail, measure and mark dots on the plastic by following the arrows marked on the photo.
Marking the Cells
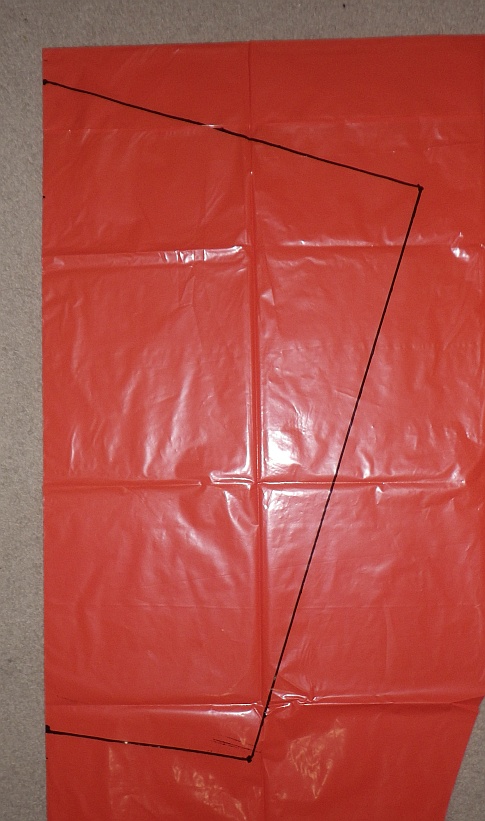 Connect the dots
- Take your ruler, and connect the dots with the black marker pen as shown in the photo.
- Flip the plastic over, and trace over all the black lines.
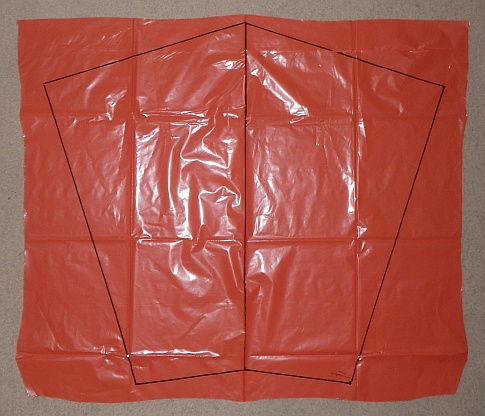 Cell plastic opened out
- As you did for the sail, open out the plastic, and lay it flat.
- Now draw a line right down the middle as shown in the photo up there.
As mentioned earlier, there's more kite making on this site than you can poke a stick at. :-)
Want to know the most convenient way of using it all?
The Big MBK E-book Bundle is a collection of downloads—printable PDF files which provide step-by-step instructions for many kites large and small.
That's every kite in every MBK series.
