Eagle Kite
How to Assemble and Fly
So you've bought yourself an eagle kite—and can't wait to fly it! Once you've put one of these together once, it's pretty easy to do it again. However, the process can be not at all obvious to the newcomer. In fact, let me tell you something...
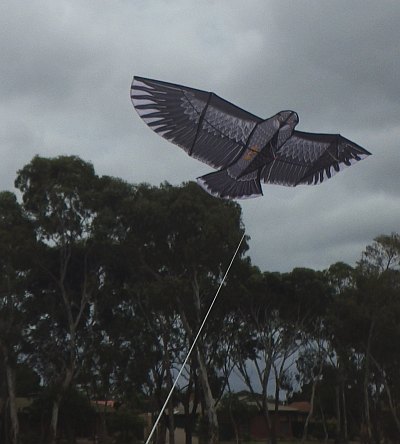 A popular retail eagle kite
Our club was putting on a display one day, with large inflatable show kites and sparred kites. A mother with young daughter approached a couple of us "experts" to get some help with assembling the eagle she had bought just minutes before.
Wouldn't you know it, it took a few minutes for us to figure it out. :-)
I had seen similar kites with the low-mounted bendy fiberglass rod before, so that was soon inserted into the appropriate pockets and through keel loops.
A small white rod went into pockets in the head part. However, after sliding out (mistake) a longer white rod, it wasn't at all clear just where it could go!
After a brief head-scratch, I noticed the pockets in the corners of the wedge-tail and realized that the longer white rod needed to go back through its loop. One end of the rod then went in one pocket before the rod was bent around so the other end could slip into the other pocket.
Anyway, all is made clear further down this page, with the help of closeup photos.
As for flying, there's a couple of videos as well.
On this site, there's more kite-making info than you can poke a stick at. :-)
Want to know the most convenient way of using it all?
The Big MBK E-book Bundle is a collection of downloads—printable PDF files which provide step-by-step instructions for many kites large and small.
Every kite in every MBK series.
Unpacking
First things first. Get the bits out and separated:
1. If the eagle kite came in a shipping package, open up one end and pull out the cloth sleeve containing the kite parts.
 Cloth sleeve
2. Open up one end and slide out the contents. My sleeve had a Velcro flap for this purpose, which you can see opened up at the top right of the photo below.
There's a plastic handle with some 30-pound nylon line wound on. And there's the kite itself with other bits either pre-attached or tucked in here and there. In my case, there was also a business card from the kite seller.
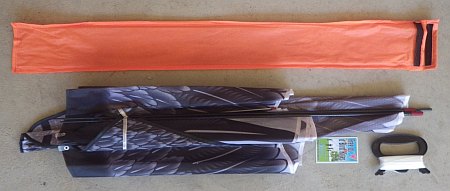 Sleeve contents
Eagle Kite Assembly
1. Spread out the kite with the black fiberglass rod running through the bird's head on top. Find the little white rod that is about as long as the bird's head is wide:
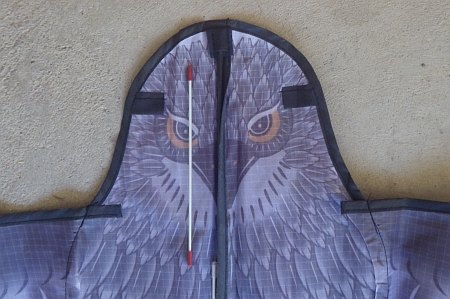
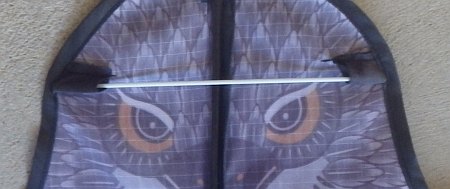
2. Insert the little white rod into a pocket on one side of the bird's head. Although stiff, the rod will bend quite a lot as you try to get the other end into the other pocket. Fiddly. This is possibly the most difficult task, since it all gets much easier from here on. :-)
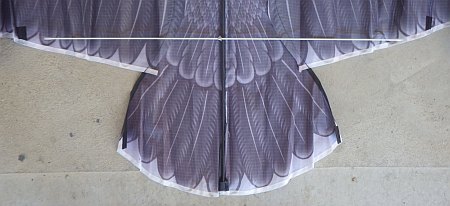
3. Down toward the tail end of the kite you will find a longer white rod that is threaded through a small white loop. That's a big clue as to what comes next, so don't pull it out! In the photo below the white rod has been rotated away from the vertical spar while still attached:
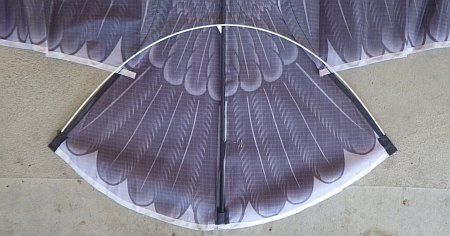
4. Just like the smaller white rod, this one is inserted into small pockets as shown. Being longer, the rod bends very easily and hence is easier to get into the pockets:
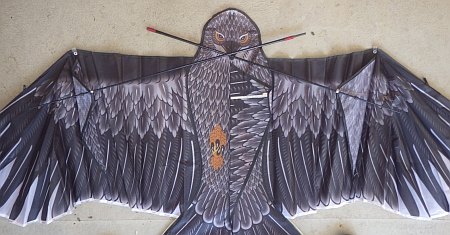
5. Flip the kite over so the graphics show and the black tubes with red tips are on top:
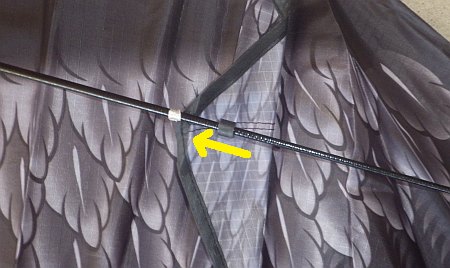
6. Both of those black rods have a small but thick black washer, one of which you can see next to the yellow arrow in the photo below. Push each washer firmly along its black rod toward the red end until it jams tight. The rods get thicker toward the red ends:
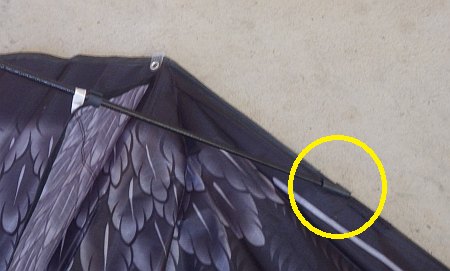
7. Insert one end of one black rod into the holder at one wingtip as shown:
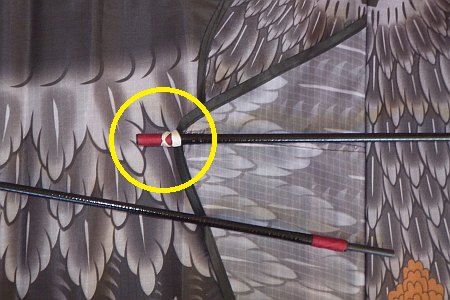
8. Near the middle of the kite, feed the two white loops on the keel over the red part of the black rod:
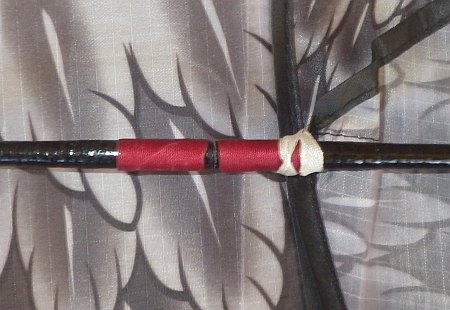
9. Plug the other black rod in, so the red bits meet. Leave the white loops as they are, for now:
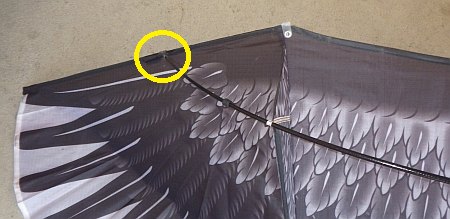
10. Insert the free end of the black rods into the holder near the wingtip. The black rods now take on a curve and sit away from the wing as shown:
11. Nearly there! At the middle of the kite, adjust the white loops to the middle of the red parts. Tie the free end of the flying line around the two white loops, between the red parts and the fabric below. Any secure knot will do for this kite:
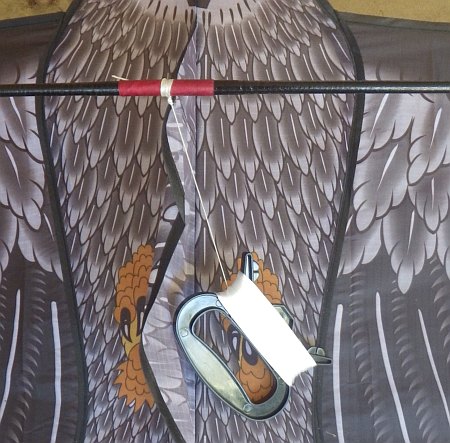
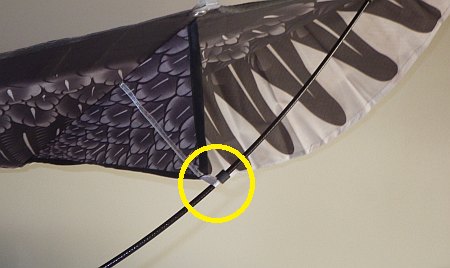
12. Finally, adjust the two side-keels so each white loop sits against the thick black washer. Here's a closeup of one keel:
Flying the Eagle Kite
Now we get to the fun part—flying! The video below shows me launching the eagle kite in a light breeze. There are just three steps to remember:
- Dangle the kite from your hand on a meter (several feet) of line.
- Wait for the breeze to catch the kite. Inland, you might have to wait a minute or three for a gust to come through!
- Let line out slowly and be ready to hold on or even pull it in a bit if the kite loses height.
OK, so the breeze was right there and there wasn't much dangling as such. But you can see line being let out, the kite climbing out of shot, and then more line being unwound from the winder to let the kite up higher. It's pretty easy down at the beach. :-)
Here's another video, showing the eagle kite flying in inland air:
The eagle is just one example of bird-shaped kites. Follow that link to discover many others!
As mentioned earlier, there's more kite making on this site than you can poke a stick at. :-)
Want to know the most convenient way of using it all?
The Big MBK E-book Bundle is a collection of downloads—printable PDF files that provide step-by-step instructions for many kites large and small.
That's every kite in every MBK series.
