- Home Page
- How To Fly
- Tying Down Kites
Tying Down Kites
Four Methods, Many Scenarios!
Sooner rather than later, anyone who obtains a kite is faced with the question: How do I secure the line so I can walk away and perhaps watch from somewhere else? Tying down kites can be done in a great variety of ways, which I have attempted to cover fairly comprehensively below. In fact, some of these techniques don't involve actual knots at all!
The idea here is to scan down and spot just two or three scenarios that match your own circumstances perfectly. You can probably ignore the rest until your circumstances change or you get the itch to try something different.
Bear in mind that anchoring those giant show kites like Octopuses and Whales is a whole different ball game. This article is angled toward anchoring single liners that can be safely flown from the hand of an adult and for any smaller outdoor kites than that.

On this site, there's more kite-making info than you can poke a stick at. :-)
Want to know the most convenient way of using it all?
The Big MBK E-book Bundle is a collection of downloads—printable PDF files which provide step-by-step instructions for many kites large and small.
Every kite in every MBK series.
Tying Down Kites to Objects
By objects, I mean poles, railings, trees, fences, or anything else you spot that is already in your kite-flying environment. Sometimes, these can be a little odd, like the large log lying beside the car park at one of my favorite flying locations. A small outgrowth on the log proved to be a handy anchor point for a flying line!
Poles and Railings
 Six turns around a goal post
 Six turns around a log fence
These generally cylindrical objects make it easy to use the six-turn method. You just pass your winder or reel around the object six times and that's it! There's no knot at all. You can just leave the winder or reel on the ground. On that point, there should be something on the end of the line, so there is no chance of the number of turns reducing by accident.
The amazing thing is, this method will always result in a rock solid resistance to the kite's pull.
Usually, these objects are vertical or horizontal; but think of kids' play equipment—there might be a few inclined railings there that are just asking to anchor a kite. :-)
Come to think of it, vertical poles which are open at the top should probably be avoided for very steep-flying kites. You wouldn't want to lose turns off the top if the kite gets caught up in a thermal!
1. The 6-Turn Tie-Down Method
The gripping force available builds very rapidly with each turn around the object. In fact, if you are mathematically inclined, the force is proportional to the number of turns to the 4th power! As a result, it doesn't make a whole lot of difference whether the object is slippery or rough. Whether well-worn metal pole or rough old tree bark, it doesn't seem to matter.
The radius doesn't matter either. A skinny pole will do, as will a tree trunk you can barely get your arms around. If the line finds plenty of friction against the surface, perhaps only 3 or 4 turns will be necessary.
But no matter what—6 turns will prevent the line from pulling free, in every situation.
Odd Holes and Gaps
 Loop'n'hitched to a mesh fence
Let me think of a few examples:
- OK, a fence railing with diamond mesh to the ground.
- A pipe coming out of a water meter.
- A link in a heavy chain.
- An outdoor bench seat with separated planks.
It's not always convenient or even possible to pass a winder around six times in these situations. So my pet method here is the Loop and Hitch.
For peace of mind, you can use a third hitch if you want to.
However, I have done experiments at home and two hitches seemed utterly secure with a long loop of braided Dacron! In fact, I went out the following day and put up the big Fresh Wind sled in gusts to 38 kph. It was left up there for a couple of hours, and the two hitches held, no problem! See the photo of the fence.
The winder or reel has no contribution, so it can just sit on the ground or anywhere else.
Finally, it's just common sense really, but avoid tying off to anything with sharp corners. You can imagine why, with all that tension and constant movement. :-)
I once tied off to a square pole with no problems—but the corners were well rounded.
2. The Loop'n'Hitch Tie-Down Method.
Form a long loop in the line, near the anchoring object. After passing the loop through the object, you effectively have a double strand of line. Pass this double strand through twice, before tying off with two Half-Hitches. The first hitch, when pulled tight, serves to secure the line. The second hitch prevents the first hitch from working loose or pulling through. I would suggest leaving plenty of the long loop hanging below the knots though. You can see all this in the photos.
Bits That Stick Out
 Cinched to a short pole
Let's see... some examples come to mind:
- A tap.
- A capped fence pole.
- A knob on children's play equipment.
- The rear-vision mirror on the side of your car. (Small kites only!)
- The short pole in the photo, with small cylinder out the side near the top.
In these cases, we can use the Cinch method. Again, the winder can sit anywhere; most likely it will end up on the ground.
If you don't take on board anything else from this page, don't forget the Cinch! It's just amazing how simple and useful this attachment method is. If you go to tie down anywhere, ask yourself—is there any possible way I could just Cinch it instead? It's such a quick and easy solution. :-)
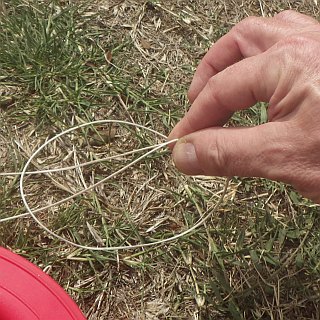
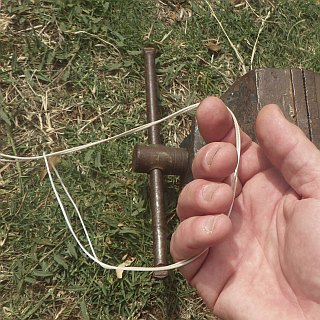
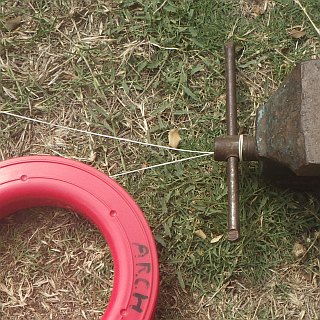
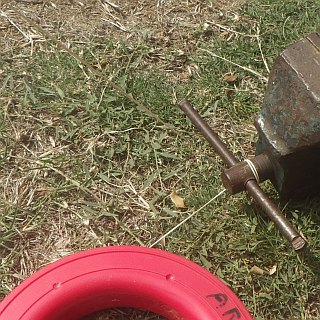
3. The Cinch Tie-Down Method
Hey, it's easy, a cinch in fact. ;-) The Cinch loop can simply be slipped over any handy object that has a cap or knob or any other feature that prevents the line slipping off. It's the handle of a small vice in the photos below.
Tying Down Kites Over Sand
The beach is a great place to fly, but of course there's nothing to tie off to over a wide stretch of sand! That's unless there's a piece of large driftwood or some such thing, half buried.
So you need some equipment. These are pretty simple and cheap things, fortunately. Here are three handy possibilities:
Sand Bags
Many kinds of bags will do, but the ones with handles are best for tying down kites. Also, unless the kite is tiny, plastic just won't do. Look for fabric bags with handles designed to take weight. For example, I use canvas shopping bags that have handles sewn from the top edge right down to the bottom end of the bag.
Sand is very heavy. A modest-size shopping bag, say 30 cm (12 in.) tall, more than half filled with sand, will anchor quite a large sparred single liner. In my case, for example, that could be my 2.4 m (8 ft.) span barn door. Or it could be a stack of seven 1-meter diamonds.
Of course, for the first attempt, stick around for a while to ensure there is not the slightest slippage of the bag! Throw a bit more sand in if necessary. Also, seating the bag in the hole where you scooped out the sand will provide extra security. That's a trick they use with the monster show kites as well. Another ploy is to pile up some sand on the upwind side of the bag.
 Cinch behind knot in handles
 Loop'n'hitched through handles
I've mentioned handles. With these, there are two ways to secure the kite:
- Tie a simple knot into the handles, if possible. With a loop handle on each side of the bag, that's four strands so it will be a bulky old knot! Never mind, that's good and secure, and you can leave it in for future flying. With the knot done, it's easy to form a Cinch knot with the flying line and then slip it over the bag-handle knot. See the photo above.
- Second, you can treat the bag handles like those Odd Holes and Gaps discussed earlier. In other words, use the Loop'n'Hitch tie-off method shown earlier. See above.
What if you can't find, or don't want to use, a bag with handles? In this case you can simply trap the line under the bag with the winder against the bag on the downwind side. For harder pulling kites, you would take a turn or two around the bag—over the top and under the bottom. Again, the winder should be up against the downwind side of the bag.
Dog Stakes
 Dog stake
These are simple devices that look like large corkscrews. The handle on top is a handy tie-off point for kites.
It's pretty obvious from looking at it; you just screw the device deep into the sand.
Use the Cinch method for a device like the one in the photo. In fact, if the handle is a loop-style one, you can still use the Cinch—around the shaft and below the handle. Removing the device is just a matter of unscrewing it back out of the sand.
Is your kite a little special and/or pricey? Consider going the extra mile as suggested to me by newsletter subscriber Glenn Mitchell.
 Tip covers
Glenn made the following points:
- Make an end cap to cover the pointy end of the stake during transport. Tether the cap to the stake handle with some light line so you don't lose it. Using shock cord will really keep the cap in place.
- Remember, if the handle is suitable, passing a stick through the handle will give you great leverage while driving the stake deep into the sand.
- If you are tempted to tie off to the D ring on the swivel, don't! Doing a Cinch or Loop-n-Hitch to the handle is much more secure. The bigger the kite, the more relevant this is. :-)
- Consider tethering a straight stake to the dog stake, to be used as an additional layer of security and stability.
Specialized Kite Stakes
If you look around online, you might see these in use. The principle is similar to the dog stake, but a nearly horizontal plate does the resistance work. You screw the device deep into the sand and then the sheer weight of sand above the plate keeps it secure. I've seen photos of these devices in use with some seriously hard-pulling kites in the sky!
Tying Off Over Dirt or Grass
Pin Down Ideas
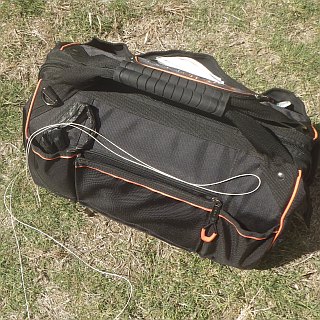
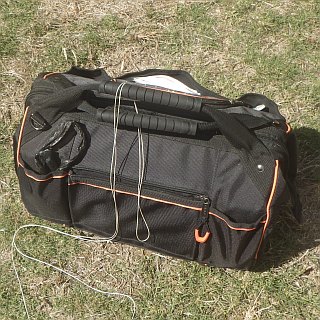
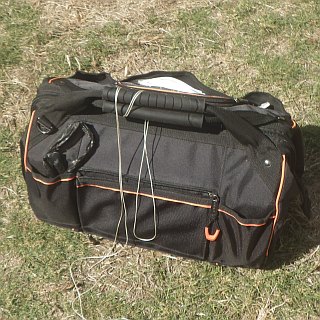
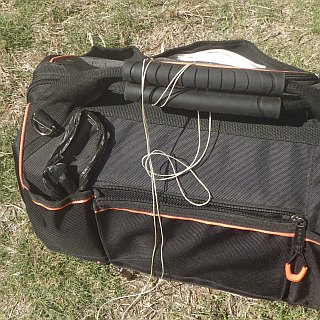
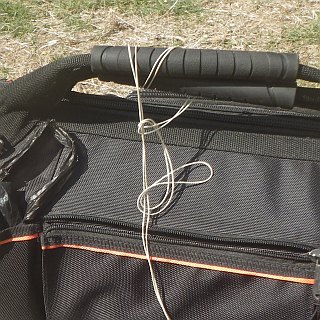
 Tool-bag pin-down
I do this a lot. For all but my heaviest-pulling kites, the tradesman's tool bag
with miscellaneous kite stuff is always on hand. Metal spring-scales,
chunky wooden winders, and a couple of metal tent pegs make very useful
contributions to the weight of the bag. :-) I don't even bother to use a
knot for small- or medium-sized kites; two vertical turns of flying line
around the entire bag does the trick, with the winder jammed up behind
the bag as a backstop. For quite small kites, you don't even need to
put turns around the bag. Incidentally, this works perfectly over sand
as well.
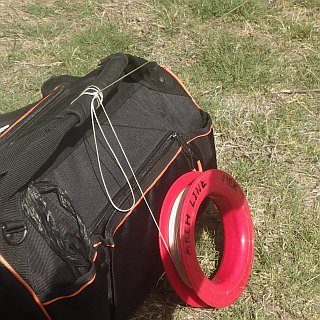
If your kite easily drags your bag along, consider the weight lifting method. ;-)
Lug one of those circular weight plates into your car before going for a fly. Out at the field, it's another opportunity for using the Loop'n'Hitch method. You use that hole in the middle, and perhaps stuff some rag in there if the sides of the hole seem sharp. Perhaps you could get a metal file to it one day, to round off or bevel those edges.
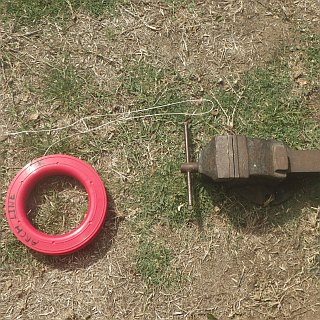
If your kite is light pulling, it might prove much more convenient to simply plonk the weight plate over the line, pinning it to the ground. The winder can be pulled up to the downwind edge of the weight as a stop. Mind you, if the wind direction swings around to a large degree, you might need to adjust things to prevent the line pulling out to one side.
Some heavy objects have no hole, but have a convenient part to which the flying line can be attached with a Cinch. I remember taking a small but quite heavy vice out flying once! The turning handle with a knob on each end made a handy tie-off point. In fact, I have used this very same vice to illustrate the Cinch Tie-down method. Scroll back a bit; it's in one of those yellow call-out boxes up there.
Finally, here's an idea for tying down kites that are small. Although you don't have access to great amounts of sand at an inland flying field, there's nothing stopping you from keeping a few quite small sandbags handy. No handles would be necessary. You could take them out and simply plonk one down over the line, with the winder up against the downwind side of the bag. Come to think of it, a small plastic drum or large plastic bottle filled with water could be used in exactly the same way.
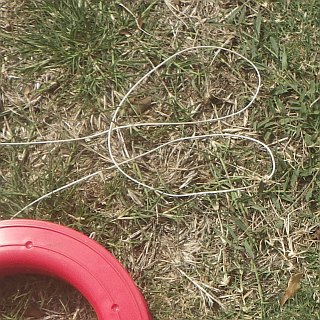
4. The Pin-Down Method
You simply pin the line to the ground with a heavy object, trapping the winder at the downwind edge of the object. Nothing could be simpler! For additional security when required, a turn or two of line can be taken around the object. Take it over the top and under the bottom, leaving the kite flying while anchored at ground level. No damage will occur to the line over relatively soft surfaces such as grass, dirt or sand. Hey, maybe it could work over snow!
Stake Ideas
 Cinched to a tent-peg
Possibly the most commonly used way to anchor single-liners over dirt or grass is to drive a stake into the ground and then tie off to that. If the ground is not particularly dry and hard, a hefty shove with a solid shoe or boot might be enough. Otherwise, this idea also requires a hammer.
These three possibilities would cover most light pulling kites, of whatever type. Small parafoils or medium sized deltas for example:
- Purpose-made kite stakes, featuring a not-so-sharp pointy end plus a handle or ball at the top, just asking to be cinched. :-) Either steel or hard plastic material is used.
- Tent pegs (some commonsense required regarding matching the size of peg to the size of kite!).
- Sharpened hardwood dowels, with a notch near the blunt end, for a secure tie-off. There you go—some DIY.
I'll be blunt—anchoring a hard pulling kite with a simple, straight-in ground-stake doesn't seem like a good idea. :-| If it goes, it goes suddenly, whereas a shifting weight at least gives you a sporting chance of catching it!
How can you tie off? The quickest and easiest way would be to Cinch the line to the stake. See the earlier illustration of the Cinch Tie-down method.
If the stake is a tent peg with a hole rather than a hook, then the Loop'n'Hitch method will be totally secure. Again, see the earlier illustration of this method.
Small Kite Weirdness
Now, here's an unusual one that can only be used in rather dry and hot climates.
Great cracks can open up in the ground after some years of dry weather. If the kite is small enough, it can be convenient to simply jam your winder down one of these cracks! OK, the winder and line might get a bit dirty and dusty, but for some readers this idea could just hit the spot one day. I did this a few times while developing the MBK Paper Series kites. These kites flew on polyester thread, wound onto square pieces of cardboard.
Flying tiny kites outdoors opens up all sorts of possibilities for tying down. I can recall putting a few of turns of thread around a weed stalk that was only centimeters tall. The thread held for ages while I took a few photos. How's that for a miniature application of the six-turn method. :-)
Tying Down Over Snow or Ice
Well, yes, this section is something of a joke right now.
You're on your own here, since I haven't even seen any snow since 1979! :-|
Oh, hang on, an idea has formed:
Tying down kites to objects already in the field is covered, but how about jamming a shovel into the snow and tying off to the handle, for example? It's something to try.
And, of course, you could look around for a suitable object to use the pin-down method.
In Conclusion
Tying down kites can be done in so many ways. Many methods don't involve any actual knot. I hope you have enjoyed this survey of methods that I have seen or used personally. Perhaps you can think of a few more.
As mentioned earlier, there's more kite making on this site than you can poke a stick at. :-)
Want to know the most convenient way of using it all?
The Big MBK E-book Bundle is a collection of downloads—printable PDF files that provide step-by-step instructions for many kites large and small.
That's every kite in every MBK series.
