- Home Page
- Better Kites
- ... Box Kite
Making a Box Kite
Step by Step—Page 3 of 3
MBK Dowel Box (mod. winds)
Making a Box Kite
Before the First Flight

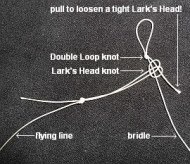
Make up a flying line and attach it to the bridle with a Lark's Head knot. See the photo, where the Lark's Head has been left loose.
Suspend the kite from the Double Loop knot of the bridle.
Shift the Prusik knot along the bridle line until the upper bridle leg makes a right angle (90 degrees) with the spar.
The kite should fly like this, but you can try shifting the knot rearwards a little for best results in lighter winds. That is, no more than a few centimeters or a couple of inches.
Making a Box Kite
Flying!

First, this kite requires more than a "very light" breeze to stay in the air. So if you can see barely any movement in the leaves of trees or bushes, perhaps take some other Dowel Series kite instead!
At the other extreme, you might snap a cross piece if you attempt to fly in very windy weather. So a fairly average moderate breeze is best.
The Prusik knot on the bridle line can loosen off a little over time. If necessary, pull on all the lines to tighten the knot before a flying session.
Out in the Field
Box-kite stories of my real-life flying experiences are worth checking out!
They're illustrated with photos and videos, of course.
Assuming there is a fair amount of breeze outside, just dangle
the kite at arm's length until the wind catches it. As long as you feel
the kite pulling, let out line slowly by taking loop after loop off the
winder. Be cautious about letting line slip through your fingers. If a
big gust hits the kite, the line could burn you! It's a good idea to
wear a glove of some sort.
Another approach is to get a helper to hold the kite up and let it go, on the end of maybe 15 or 20 meters (50 feet) of line. This way, the kite soon gets high enough to make it easy to let more line out.
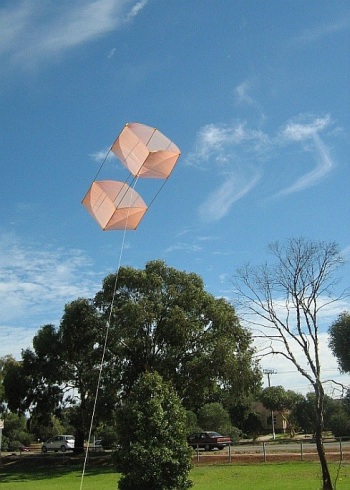
The picture up there shows the Dowel Box on its first outing, in a gusty moderate breeze. Have fun flying, and I hope you've had fun learning how to make a box kite.
Some Improvements
After testing the original kite, some improvements came to mind:
If the wind is too strong, the horizontal cross piece in the upper cell will snap. So use slightly thicker dowel for the horizontal cross piece in both the upper and lower cells to keep the kite balanced.
Right now, all the cross pieces attach quite close to the trailing edge of both cells. Try shifting them 0.1 DL (12 cm, 4 3/4 in.) away from the trailing edge. Don't forget the tape reinforcements too, so the ends of the cross pieces don't puncture the sail. This change should reduce the amount of spar bending that happens in fresh breezes while still keeping the cross pieces within easy reach during setup.
Now, just in case you have actually made and flown this kite at least once already:
Flight Reports From Other Visitors
Click below to read about various kite-flying adventures, contributed by other visitors to this page...
Making and Flying the Dowel Box Kite
I made a few modifications to the instructions:
1. Instead of one long piece for the cell, I pieced together alternate black and white plastic to make …
As mentioned earlier, there's more kite making on this site than you can poke a stick at. :-)
Want to know the most convenient way of using it all?
The Big MBK E-book Bundle is a collection of downloads—printable PDF files which provide step-by-step instructions for many kites large and small.
That's every kite in every MBK series.
