- Home Page
- Better Kites
- ... Sled Kite
How to Make a Sled Kite
Step by Step—Page 1 of 2
The MBK Dowel Sled
This set of instructions on how to make a sled kite assumes you know absolutely nothing about kite making. You might already have some of the simple tools and materials required.
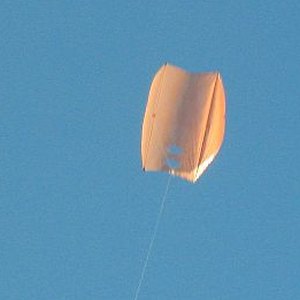 MBK Dowel Sled
Anything you don't have is easily bought. If it's not exactly what I used, then at least something pretty similar!
This kite is a large vented sled with a shallow V cut into the leading edge. It's a good light-wind flyer and can cope with gentle winds up to about 15 kph. However, it likes smooth air to fly in! It will not tolerate rough air or turbulence.
If you have trouble getting a decent flight out of it, just take it down to the nearest beach or find the widest, most open space possible.
In smooth air, you will be amazed at how this big sled parks itself up there at a high angle!
One time I did manage to coax it high on a warm day. It was fun working the line to reinflate the kite every time it got hit by thermal turbulence! It would become a "bag of washing" about to touch down, one moment, before entering a glorious long climb back to 200 feet above the field.
I have chosen to make "One Dowel Length" equal to 120 cm for every kite in the Dowel Series. If you are in North America, 48 in. of 3/16 in. dowel is close enough to 120 cm of 5 mm dowel. This will result in a kite with similar flying characteristics to my original. Make sure to find a hardwood type for your dowel.
On this site, there's more kite-making info than you can poke a stick at. :-)
Want to know the most convenient way of using it all?
The Big MBK E-book Bundle is a collection of downloads—printable PDF files which provide step-by-step instructions for many kites large and small.
That's every kite in every MBK series.
How to Make a Sled Kite
Spars
Now's the time to read up on the kite-making tools and materials required for making a Dowel Sled, if you haven't already.

For this sled, you need two lengths of 5 mm wooden dowel. For a light-wind sled, the dowel doesn't have to be very stiff.
- Make sure the dowels are exactly the same length. Trim one a little, if necessary, with the hacksaw.
- Round off the four tips with your wood file.
How to Make a Sled Kite
Sail
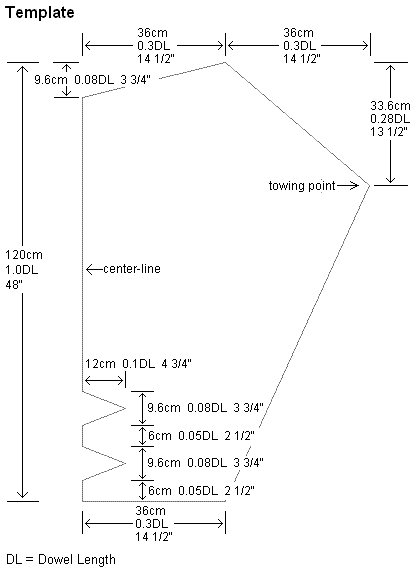
The template shown above represents one side of the kite sail. You will now transfer these measurements to the sail plastic.
Like to see a video clip? Just scroll down to near the end of this page.
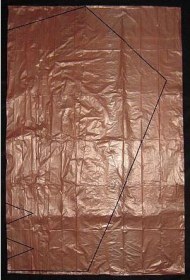
- First, take a large bag that will fit the entire template shape within one side, and lay it flat on the floor.
- Measure and mark the corners of the template shape with dots.
- Using the marking pen, rule lines between the dots. For lines longer than the ruler, just add a few extra dots using one of the dowel spars as a ruler! Then it's easy to connect the dots. It's probably best not to rule the whole line with the dowel, since it bends easily. All the lines are visible in the photo.
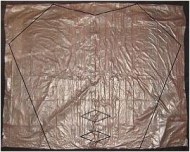
- Flip the plastic bag over, and trace over all the black lines using your marker pen and ruler.
- Cut out a rectangular section of the bag containing the kite sail; open it out, and lay it flat on the floor. You can now see the complete sail outline as in the photo.
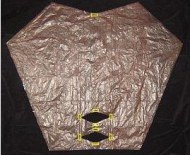
- Lay clear sticking tape along all the lines except the diamond-shaped vent holes. Most of the width of the tape should be inside the kite's outline. Use a single length of tape for each line. Hold it out straight, touch it down to the plastic at one end, then at the other end, dab it down in the middle then press down all along its length.
- With scissors, cut along all the black lines, including the vents; this will leave most of the width of the sticking tape inside the sail outline.
- Place nine short lengths of tape down as reinforcers, in the positions shown by the small yellow rectangles in the photo.
Note: Don't worry about overlapping lengths of tape at the corners; it will all look tidier after the cutting is done.
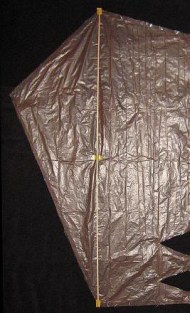
- First, pull a length of flying line tight across the plastic, over the corners where the left spar will go. Tape the line down to the floor (not the plastic!) at each end. Mark the plastic on either side of the line with dots, near the center of the kite.
- Remove the thread, and place the left spar onto the plastic.
- Prepare six lengths of electrical insulation tape, each one about three times longer than it is wide. Stick them by a corner onto something handy like a table edge. You can remove them one at a time as needed.
- Cap the ends of the spar with tape (as in the photo) by sticking it down over the dowel and plastic then folding it under the plastic to stick on the other side—a bit tricky; take your time!
- Next, lay a short length of electrical tape across the dowel and onto the plastic, at the center. Use those dots on the plastic to position the center of the dowel, which will ensure that it is perfectly straight. See the photo.
Now, tape down the right-hand spar in exactly the same way.
As mentioned earlier, there's more kite making on this site than you can poke a stick at. :-)
Want to know the most convenient way of using it all?
The Big MBK E-book Bundle is a collection of downloads—printable PDF files which provide step-by-step instructions for many kites large and small.
That's every kite in every MBK series.

