- Home Page
- Paper Kites
- Minimum Sled
Make a Minimum Sled Kite
A Paper Sled With No Sticks!
Perhaps you've read about how to make simple paper kites from single sheets of copier paper with two sticks or straws forming the spars. They're little sleds or paper planes, in other words, which dance around in light breezes outdoors or perhaps are towed around indoors if there is enough space.
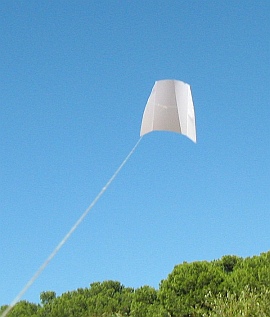 So cheap and simple - but it flies!
Well, this design goes one step further and eliminates the sticks. It does have spars, but they are folded into the sail, origami style! A bit further down this page you'll learn to make a minimum sled kite this way.
After making the original, I went out one day for a test fly. Conditions were almost calm.
Every now and then, a puff of wind came through. It proved just enough to loft the little sled up around tree height for some video and still shots—perhaps for half a minute or so each time.
But the piece of folded A4 paper certainly flew!
Like origami, making paper kites like this MBK Minimum Sled does not require any ruler measurements or scissor cuts! Read on to find out how.
So the only materials required for this super-minimal design are
- One sheet of plain copier paper. It should be A4 or Letter size.
- 12 mm (1/2 in.) clear sticking tape, preferably in a dispenser.
- Any polyester sewing thread, preferably the lightest available. The lightest available Dacron or nylon flying line would also do a good job.
No joke, that's it!
The tool required is a skewer of any type of material. It just has to be sharp, to poke a couple of holes. In fact, I got by with a bamboo BBQ skewer.
On this site, there's more kite-making info than you can poke a stick at. :-)
Want to know the most convenient way of using it all?
The Big MBK E-book Bundle is a collection of downloads—printable PDF files which provide step-by-step instructions for many kites large and small.
That's every kite in every MBK series.
Step 1—Find the Centerline
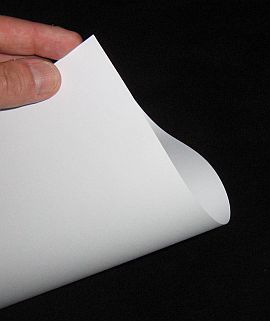
Fold the sheet so the longer sides bend. Line up two of the corners as accurately as you can.
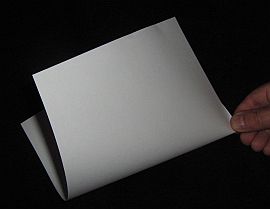
Don't crease the paper all the way along the fold. Instead, just pinch it right near one end as in the photo. Then line it up, and pinch the other end too.
Like to see a video clip? Just scroll down to near the end of this page.
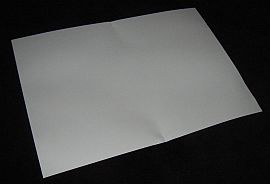
Lay the paper flat. You should see the two tiny creases as in the photo.
Step 2—Fold Up the "Spars"
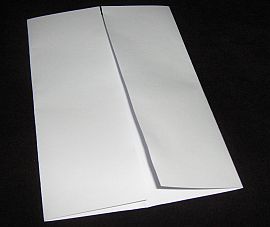
Fold the sheet in from both sides so the shorter edges meet exactly in the middle.
Lay the folded sheet on a smooth hard surface, and sharpen the creases with your fingernail. That's right, press firmly and run your fingernail up and down the creases.
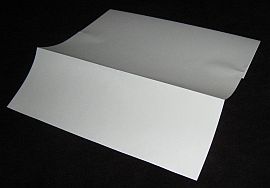
Turn the paper over, and unfold one flap as in the photo.
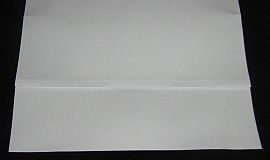
With both hands, pinch a small width of the crease, and fold it back towards you. After sharpening the new crease, it should look like the photo.
How's that—making paper kites without anything extra for the spars!
Now do the other side the same. Don't worry, I've found it's quite easy to get them both very similar in width. Just do it so it feels the same.
Step 3—Fold and Tear Leading Edges
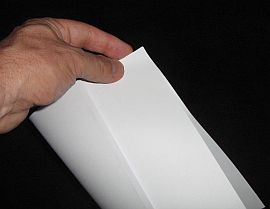
Fold the paper and line up two corners as shown.
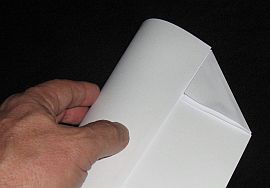
Fold both layers of paper into a triangular flap as shown. The fold line starts right next to the spar folds that are already there.
Crease sharply using your trusty fingernail—an essential tool for making paper kites!
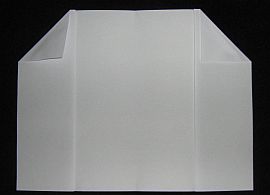
Open out the whole paper kite, and sharpen the crease of both flaps individually. Now fold them both back the other way, and sharpen the crease again with your fingernail.

Do this eight times on both flaps to weaken the fold line, then carefully tear them off.
OK, if you want to cheat on that last step, go grab a pair of scissors. I admit it's quicker, but you can't brag that you used no tools at all except a skewer! (Oh, and a fingernail.)
Now this paper kite is starting to look like a sled!
Step 4—Adding the Bridle
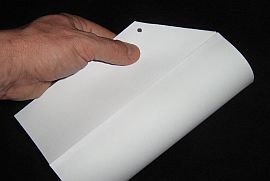
Fold the paper kite as in the photo, and line up the corners.
Then poke your sharp skewer through both layers of paper, where the black dot is.
You don't have to mark a black dot; I just marked it to make the position clear in the photo.
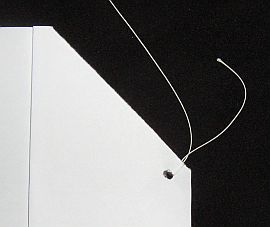
Cut off a piece of polyester thread (or light Dacron or nylon) that is at least twice as long as the longest side of a sheet of copier paper.
Tie each end through a hole in your paper kite without crushing the paper. See the photo.
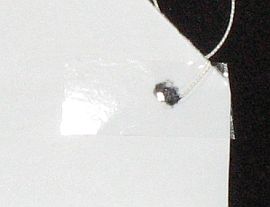
Stick a length of tape in place to reinforce the bridle attachment. Make it long enough to fold a similar length around and onto the other side of the paper. Try to make it look just like the photo.
Do the other hole the same way.
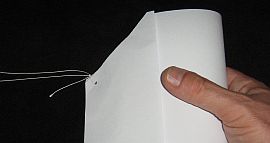
Fold the kite to bring the corners and holes together, and hence find the exact center of the bridle line.
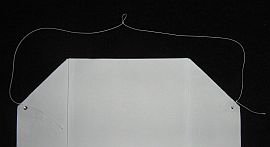
Tie a small loop into the bridle line at dead center. There it is at the top center of the photo—if you look hard!
Step 5—Flying!
That's the kite all made up. All that remains is to attach a flying line to that little loop and watch the little sled soar up to the ceiling!
Out in the Field
Sled-kite stories of my real-life flying experiences are worth checking out!
Illustrated with photos and videos, of course.
I hope you have enjoyed learning to make a minimum sled kite this way. Now, regarding flying:
Outdoors, you will need to wait for gentle winds of between 5 and 8 kph (3 to 5 mph) for best results. Or, in a dead calm, just jog along slowly to tow it up.
You will do best if you use ordinary polyester sewing thread for the flying line.
Flight Reports From Other Visitors
Click below to read about various kite-flying adventures, contributed by other visitors to this page...
Impressive Flight
I was looking to make a skewer kite today but ended up stumbling upon your paper sled design which didn't require a run to the store to get skewers!
…
Have fun, and up there is a video of this folded-paper kite for encouragement!
As mentioned earlier, there's more kite making on this site than you can poke a stick at. :-)
Want to know the most convenient way of using it all?
The Big MBK E-book Bundle is a collection of downloads—printable PDF files which provide step-by-step instructions for many kites large and small.
That's every kite in every MBK series.
