- Home Page
- Simple Kites
- Basic Kite Making
Basic Kite Making
A Hand-Waving Guide
Are you trying to make a start in basic kite making? This page will get you off to a good start without actually providing step-by-step info like in my e-books.
 If my wife, not interested in kites, can make one and fly it...
I will show you how to build possibly the quickest, simplest and most foolproof type of kite that results in reasonable flying performance. It will also prove very cheap to put together.
Sure, you can spend more time and make rather more interesting and higher-performing kites than the type described here.
But the ultra-simple diamond described below will provide the all-important early success that you need. Then you might end up really motivated to progress further in the hobby.
Great durability or crash-resistance is not a priority here, since you just want to see your creation fly, right? ASAP!
After a bit of the inevitable wear and tear, you can just patch things up with a bit of tape. If worst comes to worst, it's not hard to quickly whip up another kite.
In time, you might move on to less basic kite-making techniques that result in hardier kites. Besides, you'll be less prone to mistreat them then!
On this site, there's more kite-making info than you can poke a stick at. :-)
Want to know the most convenient way of using it all?
The Big MBK E-book Bundle is a collection of downloads—printable PDF files which provide step-by-step instructions for many kites large and small.
That's every kite in every MBK series.
Basic Kite Making
Materials
 MBK Simple Diamond
Suitable sail material is all around, just about anywhere you look. It just has to be light. The lighter the better. Serious kite-makers tend to turn up their noses at plastic, but the truth is it's a fantastic material for your very first kite. Here's a list of possibilities:
- garbage bags (best for quite small kites, say up to 50 centimeters or 18 inches in height)
- garden bags (similar, although some brands are slightly heavier multi-ply)
- old shower curtains (make sure the kite is fairly big, say over 1 meter or 3 feet tall)
- space blankets (similarly!)
- painters' drop sheets (for even bigger kites)
Finding spar material (the sticks that the sail is attached to) is a little harder. But it's still fairly straightforward. For rather small kites, you can experiment with bamboo BBQ skewers. Find them in any supermarket. Kites about 1 meter (3 feet) in height can employ 5 millimeter (3/16 inch) hardwood dowel. Hardware stores sell wooden dowel.
Here's the trick with basic kite-making using wooden dowel—if your finished kite bends like crazy and flops about on the end of the line without flying well, the dowel is too narrow. Go up a size or two and try again! At the other extreme, if your kite needs a fresh breeze to even look like flying, your dowel is far too thick and heavy. Go down a size or two and try again! A light wind is all the kite should need.
Basic Kite Making
A Plastic Diamond
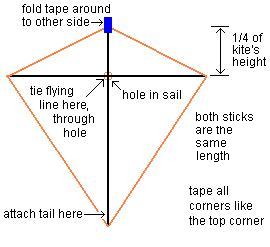
Armed with the diagram down there and the general guidelines already given, you have a great chance of seeing your very own diamond kite soar up high into the blue—or the gray or white or whatever. Soon.
See how the flying line attaches to where the spars cross. The location of that crossing point is important. Stick to it exactly, and you should not be disappointed when the kite is ready for a test fly.
By the way, the flying line is threaded through a small hole in the sail to where it is tied to the spars. When flying, the spars are on the far side of the kite. You will most likely be able to see the spars through the plastic sail.
This basic kite design definitely needs a tail. A simple ribbon of the same material as the sail will do, about 1/10 as wide as the kite itself. Just to be safe, try making it ten times as long as the kite is high. That might seem a lot, but it can make up for inaccuracies in construction. It gives you the best chance of success. Just tie the tail to the vertical spar where indicated on the diagram.
When you have the kite flying successfully, you can experiment with shorter tails. The shorter the tail, the wilder and more unpredictable the flight patterns!
Out in the Field
Diamond-kite stories of my real-life flying experiences are worth checking out!
Illustrated with photos and videos, of course.
Join those spars together any way you like. Just keep it light! Go for strong thread rather than high-tensile fencing wire :-)
In fact, if you are happy to have the flying line permanently attached to the kite, simply bind the spars together with the end of the line.
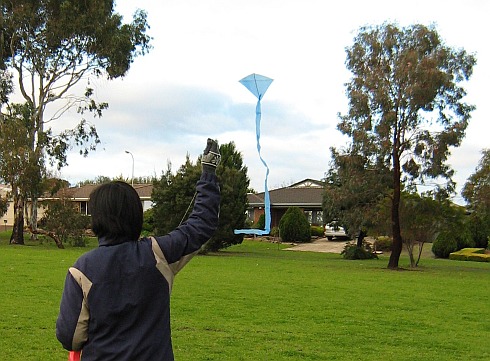
The raw simplicity of this approach does not call for anything around the edge of the sail either—no string, no tape, which is quick and simple! This is definitely basic kite-making. See the tiny blue diamond below, which uses two bamboo skewers for spars.
This kite, in almost any size, will fly a little erratically, but
that long tail will keep bringing the nose back into line with the wind.
Thus the kite will remain well off the ground. The ideal wind strength
required will vary according to just how big and how heavy you have
made this diamond.
I hope you have enjoyed this discussion of basic kite-making. Happy flying! Once you have seen your first plastic diamond dancing around at 200 feet, you'll be itching for more. Browse around this site a bit more, and you'll find enough to keep you busy for years!
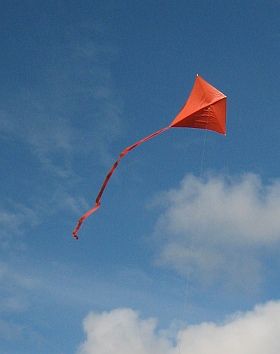
Check out one of our own simple dowel-and-plastic diamonds in the video below. The breeze is rather light, but as you will see, the kite finally manages to climb away to a more respectable angle:
As mentioned earlier, there's more kite making on this site than you can poke a stick at. :-)
Want to know the most convenient way of using it all?
The Big MBK E-book Bundle is a collection of downloads—printable PDF files which provide step-by-step instructions for many kites large and small.
That's every kite in every MBK series.

