- Home Page
- Stunt Kites
- Cheap Delta
Our Kite Reviews
A Cheap Delta Stunt Kite
This kite reviews page was to be the start of a series of such reviews over time. However, the direction of the site changed after that.
This page has been shifted here, since it is still a useful story of what to expect, from a "raw stunt-kiting beginner" perspective.
The format for the text below is simple. We just told the story, in some detail, of our experience. That is, from pulling the rather cheap kite from its packaging, right through to its first flying session.
What actually happened is what you will read here.
On this site, there's more kite-making info than you can poke a stick at. :-)
Want to know the most convenient way of using it all?
The Big MBK E-book Bundle is a collection of downloads—printable PDF files which provide step-by-step instructions for many kites large and small.
Every kite in every MBK series.
Delta Stunt Kite—Assembly
Yep, that's the actual name on the packaging! How do they get away with that, considering it's the general name for a whole class of kites?
There's the unopened kite package, leaning up against a wall at
home. It cost just ten Aussie dollars! These are sold in a variety of
outlets, not just kite shops. Hence this particular kite is a real mass-market item and is sold alongside all kinds of other "cheap stuff."
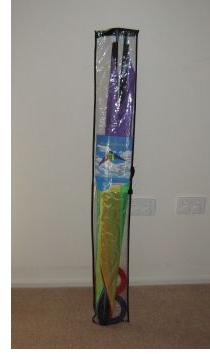
Putting that aside, here's what happened. We opened the package, which contained the following items:
- nylon kite sail, with six-leg bridle, two standoffs, and the three main spars pre-installed
- fiberglass spreader, standing upright in the picture
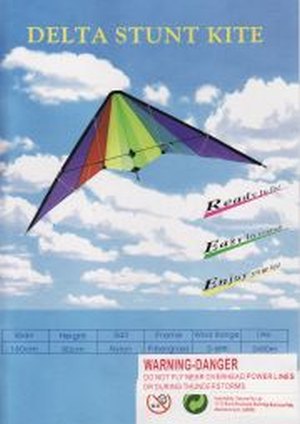
- glossy information card—that's it at the top of this page
- two reels with 50 meters (160 feet) of braided line on each
I immediately knotted the lines to the bridle rings, one on each side of the kite.
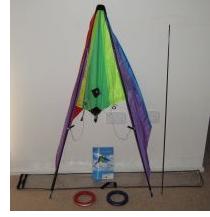
Then, it was time to check the assembly before getting out on the flying field.
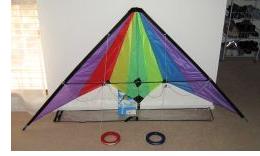
The spreader was inserted into the plastic fittings, one on each side of the kite. Also, I clipped the standoffs onto the spreader. It was all quick and easy; no problems there.
There's the completed kite in the picture. It was not totally ready-to-fly as claimed but near enough!
Now for a few words about the info card, which you can see at the top of this page. It contained the following info:
- span: 160 centimeters
- height: 80 centimeters
- sail: nylon
- frame: fiberglass
- wind range: 2 to 6 Beaufort
- lines: 2 x 50 meters
As well, you can see the warning sticker that tells people not to fly near power lines or during thunderstorms—very sensible.
The full-color glossy picture of the kite flying against a backdrop of fluffy cumulus clouds is faked. Looking closely, I could see the bridle lines hanging limply over the spreader and not connected to any flying line! Does this really matter? Nope.
After packing the kite down to a manageable bundle, we looked outside and decided there was just enough wind to give it a shot. We all piled into the car for the short trip to the reserve near the school in Old Reynella. Why this reserve, instead of the usual one? Basically, it was because of all the wide open space available. Stunt kites spend a lot of time at low level, so we weren't keen on having upwind trees and bushes messing up the air and making things difficult.
Delta Stunt Kite—Flying
We arrived and walked over to the open area, where there seemed to be a bit of breeze blowing. So far, so good.
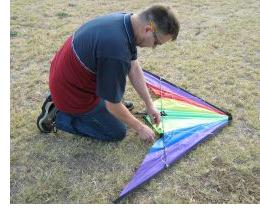
I laid the kite on its back and assembled it, slipping in the spreader and clipping in the stand-offs. I had tied the flying lines to their rings while still at home, if you remember.
Walking backward, I let both reels unwind, using a finger from each hand as axles! All 50 meters went out so I would have a bit of time to react when the kite got in the air.
First, with a bit of breeze on my back, I attempted to ground-launch off the grass as I am so fond of doing with single-line kites. This just didn't work, with the stunt kite's nose staying firmly in the grass.
It was time to recruit the wife. ;-) May dutifully held the kite up, after which I pulled it into the air from out of her hands.
The wind at this time was wavering from almost calm to somewhere in the 2 Bft range. I'll get around to explaining the Beaufort scale on this site at some later stage, but 2 Bft is when the bottom edge of a flag tends to stay straight out from the pole. On trees, small branches start to move around.

So what happened... The kite climbed just a little before it started to rotate to the right. I corrected a few times, but the delta ended up on the ground soon after. It was my fault, since I had no idea just how responsive the kite would be.
Then followed a few more short flights, where my wife learned that throwing the kite into the air just makes things harder for the kite pilot! These flights ended with:
- the nose pitching up and down, before settling on the ground
- the kite entering a total stall, then spinning to the ground
- lurching up and then looping into the ground after almost entering a tail slide
Finally, we had a smooth launch into a decent gust of wind! This time I tried to hold equal tension on both lines, letting the kite climb away, straight up. Cautiously, I tried turning each way, managing to cover some ground to each side of the centerline. The stunter proved difficult to keep in the air when there was hardly any tension in the lines. Huge movements were required to get any turning response from the kite.
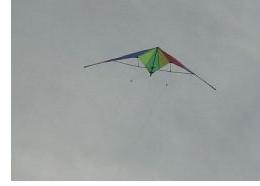
We had fun for a while, with me flying and my wife taking pictures. I was just trying to keep the kite in the air most of the time. The wind kept dropping, leading to a semi-stalled kite and loss of control.
The control feel changed a lot with wind speed and how far off center the kite was, so it was a struggle.
Flying this kite should be a lot easier when the wind is constantly in the 2 Bft range or above. After all, the packaging said 2 to 6 Bft! Also, it could be that more expensive stunt kites are easier to control. From what I read, they are definitely more precise through the air. One big factor is the stretch in the lines. The braided lines of our cheapie behave a bit like rubber bands with 50 meters let out!
And that's it for our short-lived series of kite reviews!
As mentioned earlier, there's more kite making on this site than you can poke a stick at. :-)
Want to know the most convenient way of using it all?
The Big MBK E-book Bundle is a collection of downloads—printable PDF files that provide step-by-step instructions for many kites large and small.
That's every kite in every MBK series.
