- Home Page
- Better Kites
- ... Diamond Kite
How to Build a Diamond Kite
Step by Step—Page 1 of 3
The MBK 2-Skewer Diamond
This set of instructions on how to build a diamond kite assumes you know absolutely nothing about kite making. And if you are a "visual learner", it should be possible to complete the kite by referring only to the pictures.
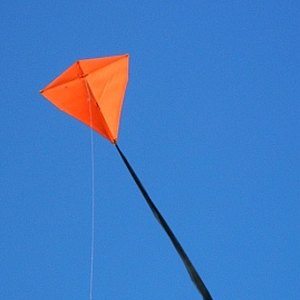 MBK 2-Skewer Diamond
You might already have some of the simple tools and materials required. Anything you don't have is easily bought. If it's not exactly what I used, then at least something pretty similar!
Probably the most important thing to get right is making and adjusting the bridle. This trips up so many would-be kite makers who are trying it for the first time! I've tried hard to make the instructions foolproof in this area.
At 58 cm (23 in.) across, the MBK 2-Skewer Diamond kite is small enough for kids and yet provides great light-wind flying performance for adults to enjoy as well.
The 2-Skewer Diamond has dihedral (the horizontal spar has a shallow V shape) and flies on a two-leg bridle. Only a short tail is required, although long and colorful ones can be used for more spectacle in the air!
On this site, there's more kite-making info than you can poke a stick at. :-)
Want to know the most convenient way of using it all?
The Big MBK E-book Bundle is a collection of downloads—printable PDF files which provide step-by-step instructions for many kites large and small.
That's every kite in every MBK series.
How to Build a Diamond Kite
Sail
Now's the time to read up on the tools and materials required for making a skewer kite, if you haven't already.
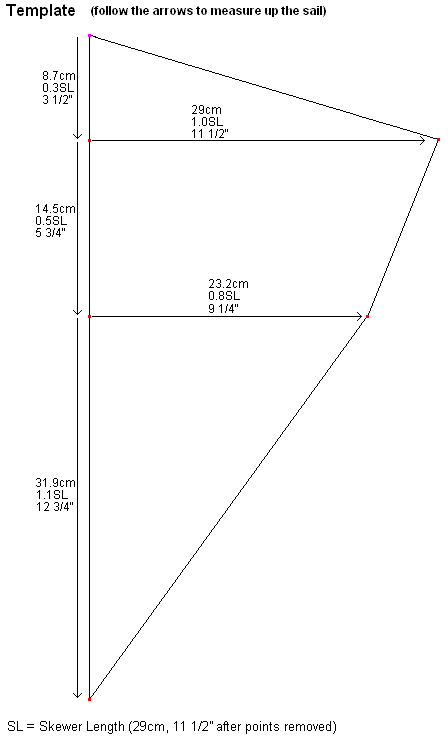
The template shown above represents one side of the kite sail. You will now transfer these measurements to the sail plastic.
Like to see a video clip? Just scroll down to near the end of this page.
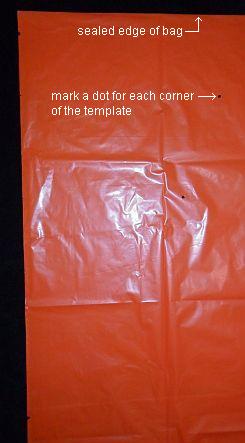
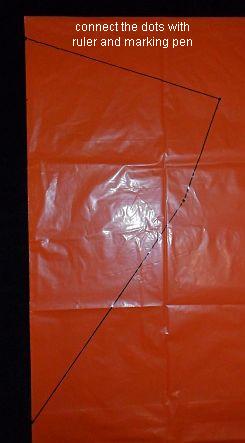
- Take a light plastic bag that will fit the entire template shape within one side, and lay it flat on the floor.
- Mark dots on the plastic, corresponding to the corners of the template. There is no need to use a T-square, since any small error will be duplicated on the other side of the sail. And it will make hardly any difference to how the kite flies.
- Using the marking pen, rule lines between the dots to create the template shape.
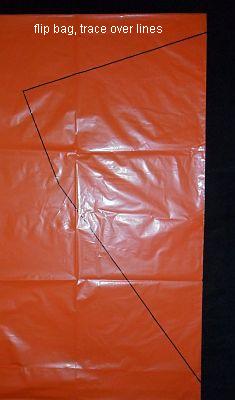
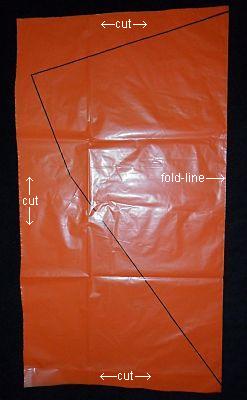
- Flip the plastic bag over, and trace over all the black lines using your marker pen and ruler.
- Cut out a rectangular section of the bag containing the kite-sail outline.
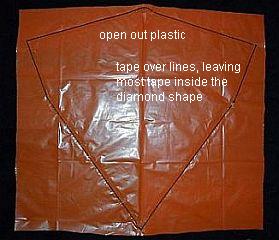
- Open the plastic out, and lay it flat on the floor; you can now see the complete sail outline as in the photo.
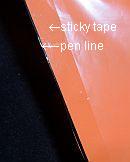
- Run clear sticky tape along every straight line, leaving most of the tape on the inside of the sail edges.
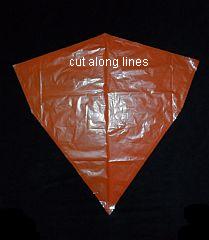
- Cut along the black lines with scissors to create the sail. See the closeup photo.
The video down there shows this latest version of the 2-Skewer Diamond on its very first flight, flying about on a fairly long line. Winds were gusting into the moderate range, causing the diamond to loop occasionally.
As mentioned earlier, there's more kite making on this site than you can poke a stick at. :-)
Want to know the most convenient way of using it all?
The Big MBK E-book Bundle is a collection of downloads—printable PDF files which provide step-by-step instructions for many kites large and small.
That's every kite in every MBK series.
