- Home Page
- Better Kites
- ... Roller Kite
How to Make a Roller Kite
Step-by-Step—Page 3 of 4
The MBK 1-Skewer Roller
How to Make a Roller Kite
Keel

- Mark out the keel shape on some spare plastic, as per the dimensions on the template. A keel in black garbage-bag plastic looks good with a light-colored sail!
- Cut out the keel and tape down two lengths of flying line onto one side, using clear sticky tape. One goes from the bridle attachment point to the upper attachment point, and the other goes from the bridle attachment point to the lower attachment point. The pieces of line hanging free should be at least as long as your finger. See the photo.

- Now flip the plastic over and tape down another two lengths of flying line, directly over the first two.
- Where two pieces of line come together, tie a Multi-Strand Simple knot close to the plastic. These two knots will sit against the vertical spar.
- Where the four pieces of line come together, tie them into another Multi-Strand Simple knot close to the plastic, then tie another one further out. The photo shows some of these knots.
How to Make a Roller Kite
Attach the Keel
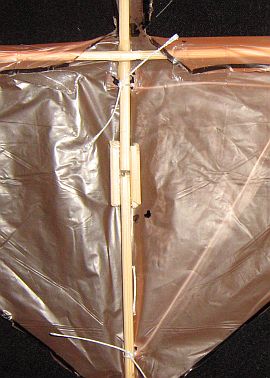
- Poke a hole in the lower sail, just below where the lower horizontal spar crosses the vertical spar.
- Take the keel, poke the upper two lines through the hole and pull tight against the knot, then tie them off around the bamboo with a Granny knot.
- Use the keel itself to find the exact spot to poke the lower two lines through, near the bottom tip of the vertical spar. Poke a hole in the plastic there, thread the lines through and tie them off around the bamboo. As in the photo.
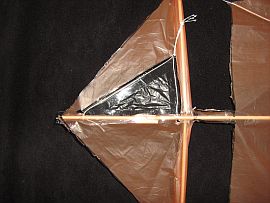
- Flip the kite over, lay the keel down flat, and lay a length of
sticky tape all along the base of the keel. Half the width on the keel,
the other half on the lower sail plastic. See the photo.
- Now flip the keel over, so it lies flat again. Stick down the base with sticky tape. Now the keel is attached along its full length, on both sides.
How to Make a Roller Kite
Attach the Bridle
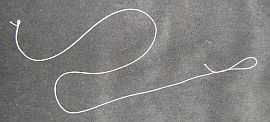
- Lay the kite down with the keel on top, then cut off a length of flying line about three skewers long
- Tie a small Loop knot into one end, and a larger one into the other end. See the photo.
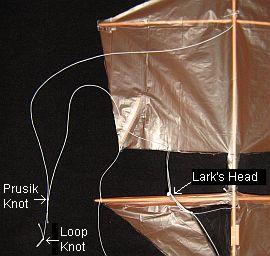
- Poke a hole in the upper sail, just above where the upper horizontal spar and the vertical spar cross.
- Using the small loop knot end, attach the line to the vertical spar with a Double Wrap Slip knot.
- Attach the other end to the keel using a Larks Head.
- Now take a length of flying line about half a skewer long, and tie one end to the bridle line with a Prusik knot. Tie a small Loop knot into the other end. There's the whole bridle, in the photo.
- Secure each knot on the vertical spar with a tiny blob of wood glue.
How to Make a Roller Kite
Tail
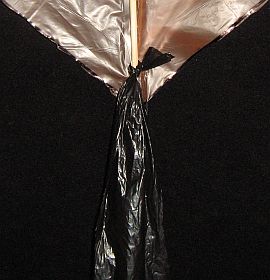
- Cut out a long thin rectangle of colored plastic for the tail. Mine is black, to contrast with the orange sail. Make it 8.0 SL (230 cm, 90 in.) long and 0.2 SL (5.8 cm, 2 1/4 in.) wide. Knot pieces together if necessary, to get the full length. Avoid taping, because it adds weight!
- Tie one end around the vertical spar, between the keel knots but as close as possible to the lower knot. A single Half Hitch will do, since there are very low forces on the tail in flight. Pull it fairly tight and trim off any excess plastic. See the photo for the final result.
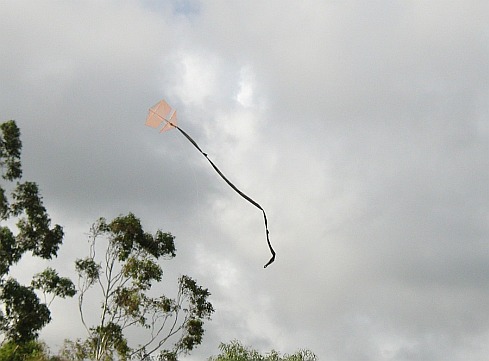
At this point, you've finished making the 1-Skewer Roller!
To attach the flying line, just Lark's Head the flying line to the short bridle line.
As mentioned earlier, there's more kite making on this site than you can poke a stick at :-)
Want to know the most convenient way of using it all?
The Big MBK E-book Bundle is a collection of downloads — printable PDF files which provide step-by-step instructions for many kites large and small.
Every kite in every MBK series.
